Christmas dessert is the delightful finale to your festive feast, bringing warmth and sweetness to the holiday table. From traditional favorites like pie and pudding to modern twists that surprise the palate, there’s something for everyone to enjoy.
Every bite is a celebration of flavors and memories, perfectly suited to spread cheer and create lasting moments with loved ones.
Spiced Apple Crisp

Spiced Apple Crisp is a warm and inviting dessert that perfectly captures the essence of the holiday season. The image showcases a cozy bowl filled with tender baked apples, topped with a crunchy, golden-brown crumble. A scoop of vanilla ice cream melts on top, adding a creamy touch to the dish. Drizzled with caramel, it looks simply irresistible.
This dessert is not just about taste; it’s about the comforting aromas that fill your kitchen while it bakes. The blend of cinnamon and nutmeg creates a delightful fragrance that brings everyone together. It’s a treat that’s easy to make and perfect for sharing with family and friends during festive gatherings.
Let’s get into the details of making this delicious Spiced Apple Crisp. You’ll need some fresh apples, a few pantry staples, and a little bit of love to create this delightful dessert.
Chocolate Peppermint Bark
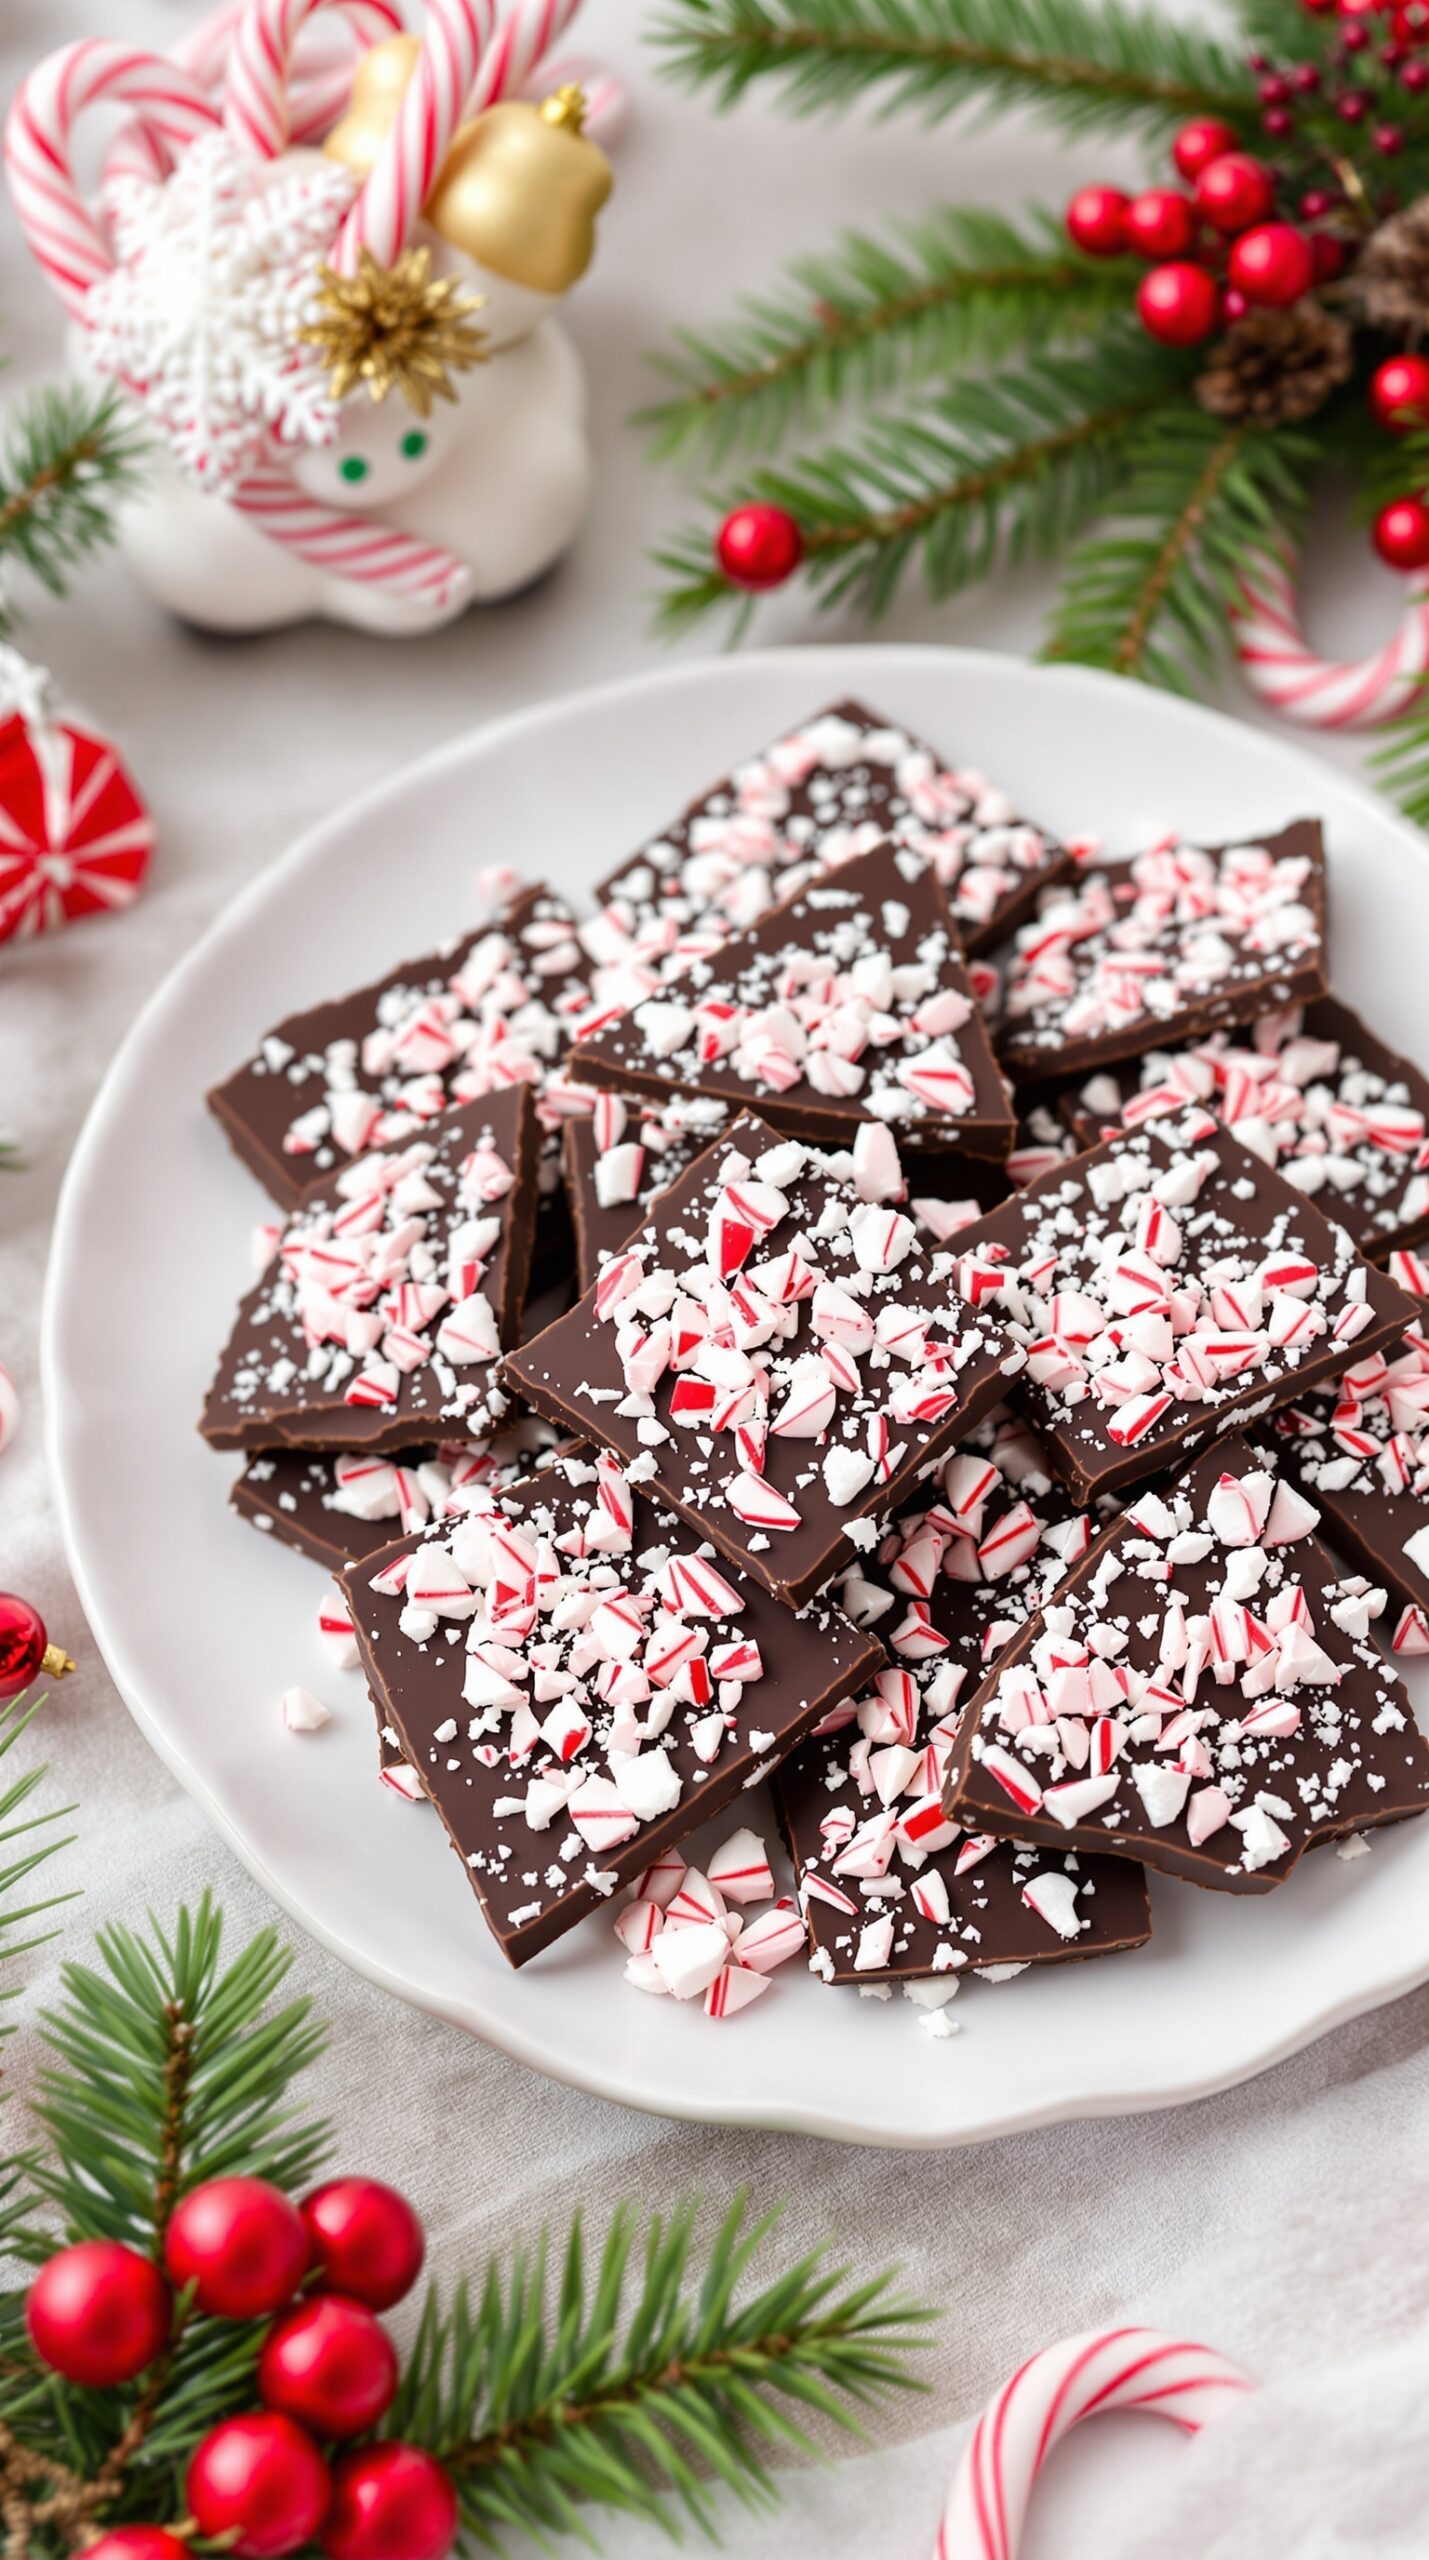
Chocolate peppermint bark is a festive treat that brings together rich chocolate and refreshing peppermint. The image shows a beautiful plate filled with perfectly cut pieces of this delicious bark, topped with crushed peppermint candies. The vibrant red and white of the peppermint contrasts beautifully with the dark chocolate, making it a delightful addition to any holiday spread.
This dessert is not only visually appealing but also incredibly easy to make. It’s perfect for sharing with friends and family during the holiday season. The combination of smooth chocolate and crunchy peppermint creates a satisfying texture that everyone loves.
Making chocolate peppermint bark at home is a fun activity. You can customize it by using different types of chocolate or adding other toppings like nuts or dried fruit. It’s a great way to get into the holiday spirit!
Ingredients
- 12 ounces dark chocolate, chopped
- 12 ounces white chocolate, chopped
- 1 teaspoon peppermint extract
- 1 cup crushed peppermint candies
Instructions
- Melt the Dark Chocolate: In a microwave-safe bowl, melt the dark chocolate in 30-second intervals, stirring in between until smooth.
- Add Peppermint Extract: Stir in the peppermint extract and mix well.
- Spread the Chocolate: Pour the melted dark chocolate onto a parchment-lined baking sheet. Spread it evenly with a spatula.
- Melt the White Chocolate: In another bowl, melt the white chocolate in the same way as the dark chocolate.
- Layer the White Chocolate: Pour the melted white chocolate over the dark chocolate layer. Use a spatula to spread it evenly.
- Add Crushed Peppermint: Sprinkle the crushed peppermint candies over the top while the chocolate is still warm.
- Chill: Place the baking sheet in the refrigerator for about 2 hours, or until the chocolate is set.
- Break into Pieces: Once set, remove from the fridge and break the bark into pieces. Enjoy!
Cranberry Orange Tart

The Cranberry Orange Tart is a festive delight that perfectly captures the spirit of the holiday season. With its vibrant colors and refreshing flavors, this tart is sure to impress your guests. The bright orange slices paired with tart cranberries create a beautiful contrast, making it a stunning centerpiece for any holiday table.
The crust is buttery and flaky, providing a perfect base for the sweet and tangy filling. Each slice offers a burst of citrusy goodness, balanced by the slight tartness of the cranberries. This dessert is not only a feast for the eyes but also a treat for the taste buds!
To make this delightful tart, you’ll need a few simple ingredients. Gather your fresh cranberries, oranges, and some pantry staples. Follow the steps below to create this delicious dessert that will surely become a holiday favorite.
Ingredients
- 1 pre-made tart crust
- 2 cups fresh cranberries
- 1 cup granulated sugar
- 1/2 cup orange juice
- 1 tablespoon orange zest
- 1 tablespoon cornstarch
- 1/4 teaspoon salt
- 1 tablespoon butter
- 1 orange, sliced for topping
Instructions
- Preheat the oven to 350°F (175°C).
- In a saucepan, combine cranberries, sugar, orange juice, orange zest, cornstarch, and salt. Cook over medium heat until the cranberries start to pop and the mixture thickens, about 10 minutes.
- Remove from heat and stir in butter until melted. Let it cool slightly.
- Pour the cranberry mixture into the pre-made tart crust, spreading it evenly.
- Arrange orange slices on top of the filling for decoration.
- Bake in the preheated oven for 25-30 minutes, or until the crust is golden brown.
- Let it cool before slicing. Serve chilled or at room temperature.
Pecan Pie Bars
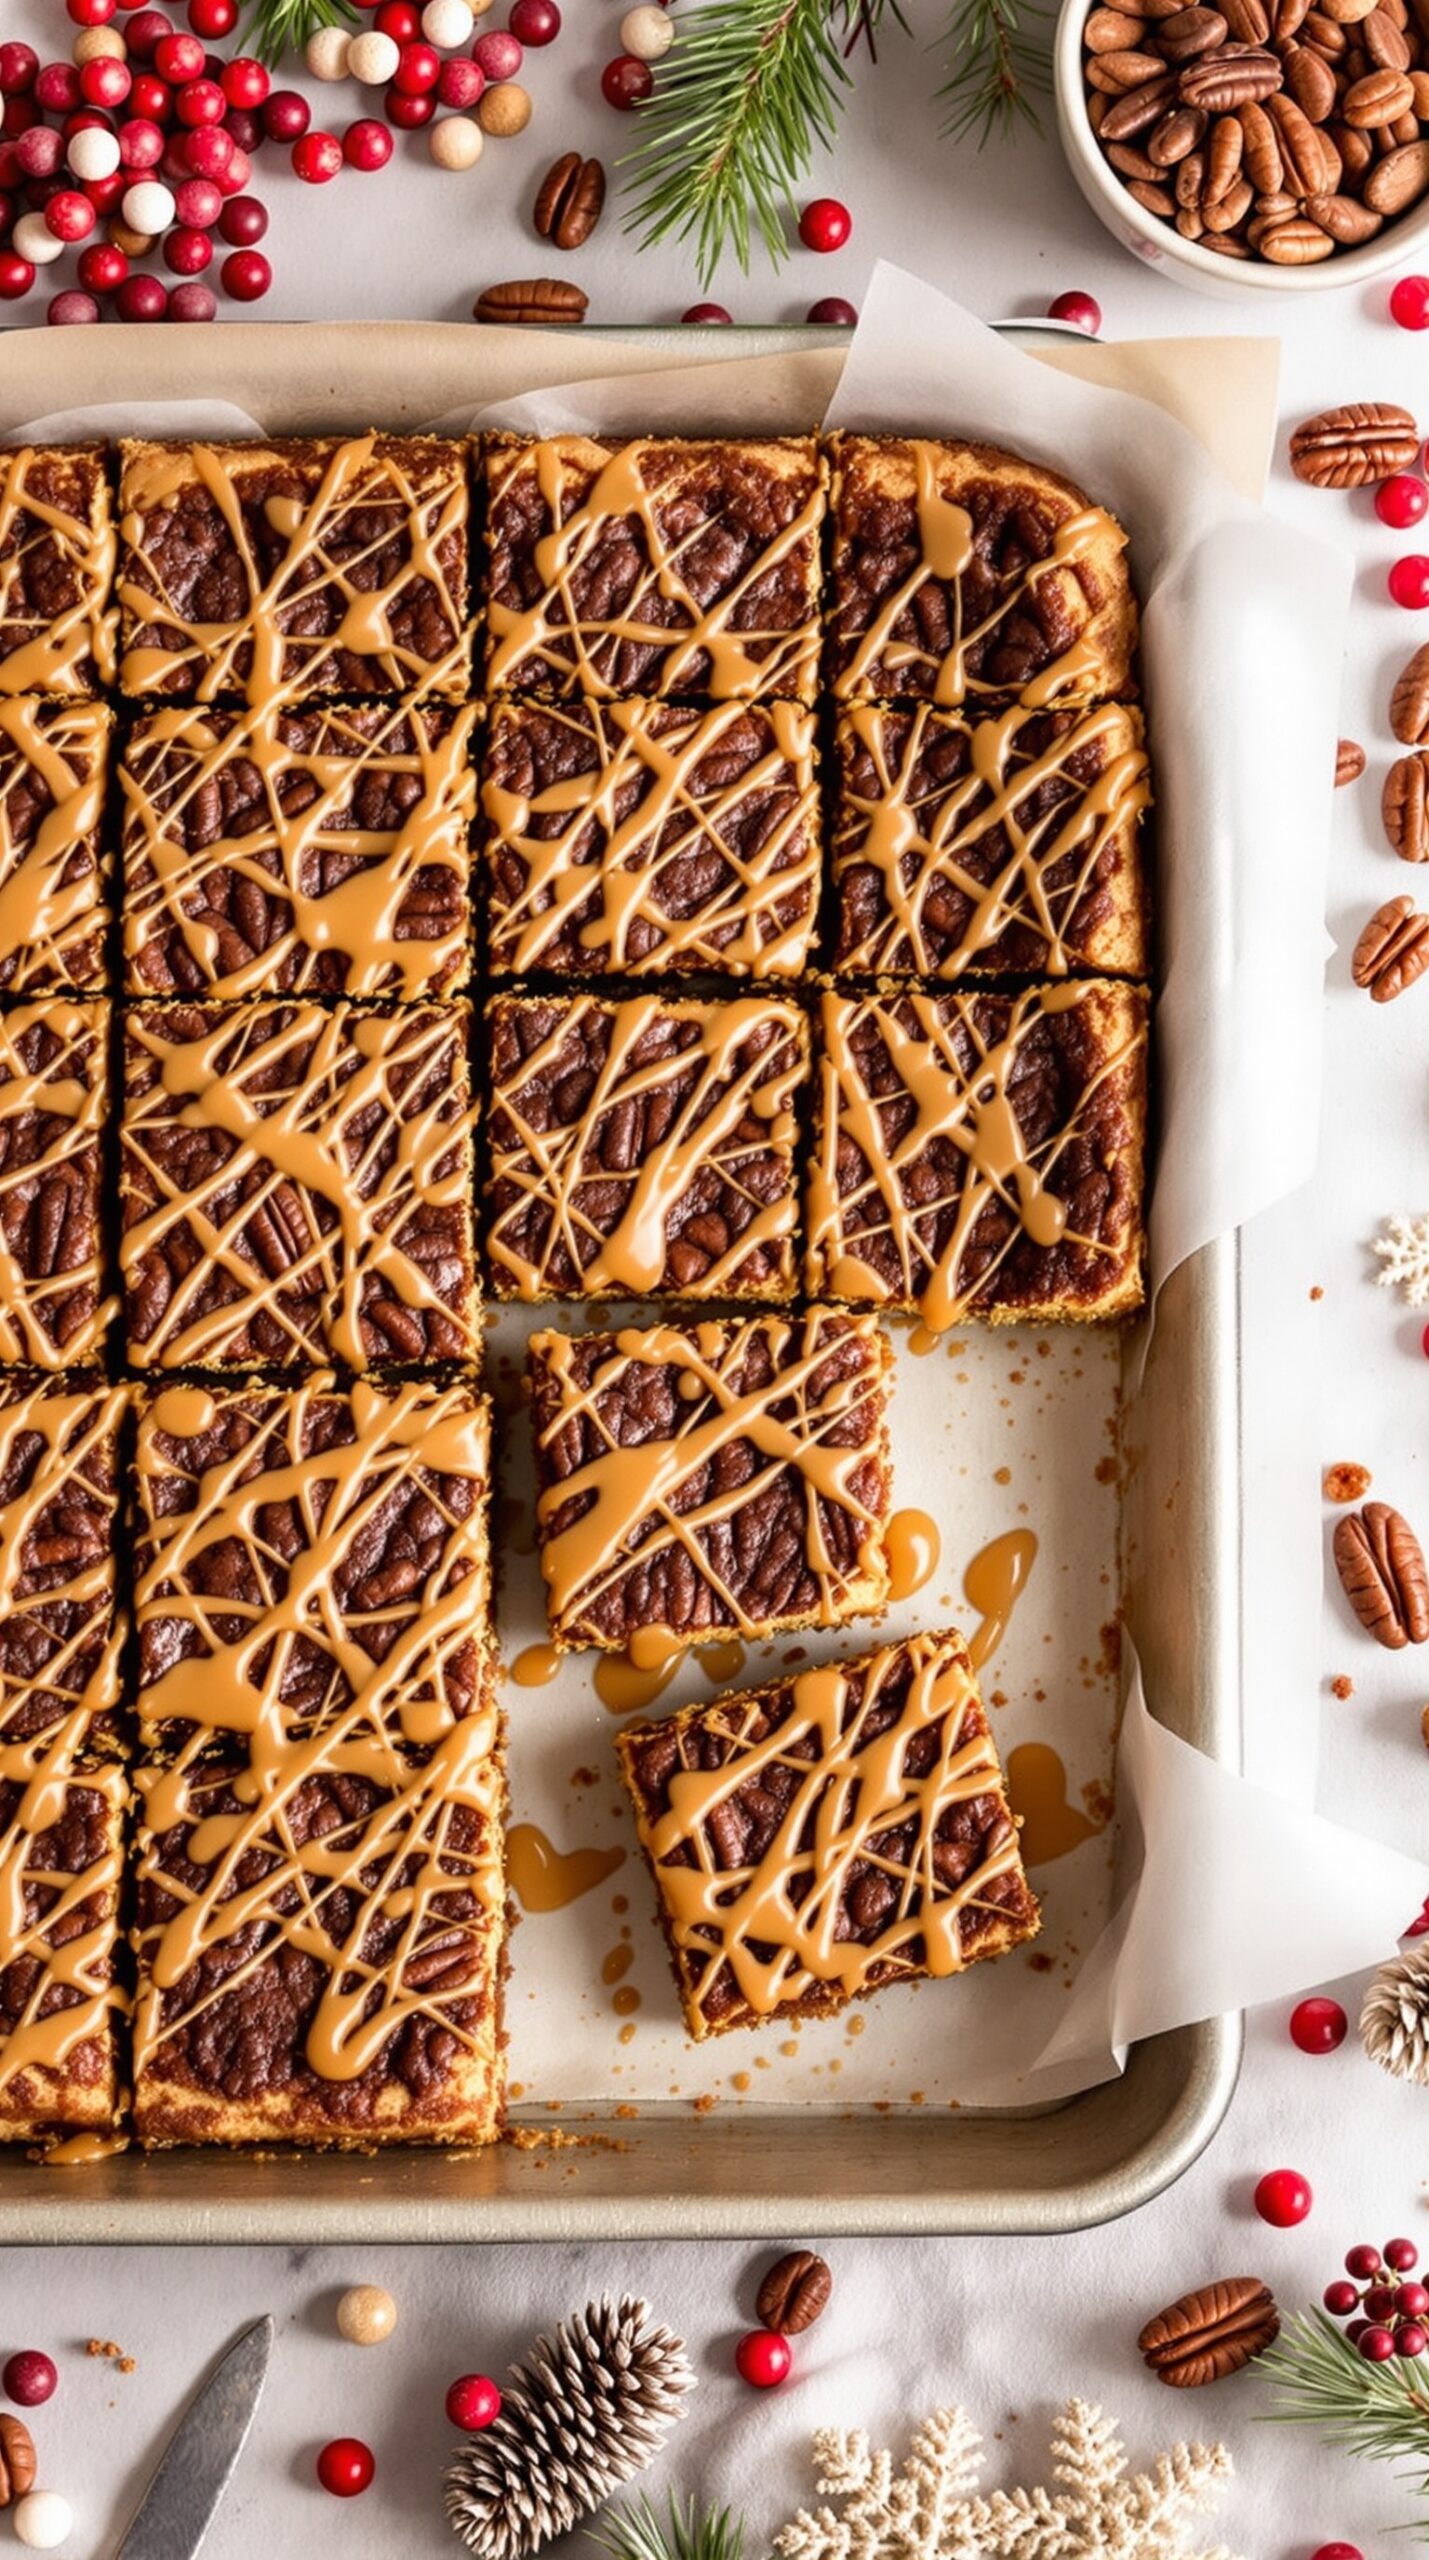
Pecan pie bars are a delightful twist on the classic pecan pie. They bring all the rich flavors of the traditional dessert in a convenient bar form. The golden crust is buttery and crumbly, providing a perfect base for the sweet and nutty filling. Topped with a drizzle of caramel, these bars are sure to impress at any holiday gathering.
These treats are not just visually appealing; they are also easy to cut and serve, making them a great addition to your Christmas dessert table. The combination of pecans and caramel creates a satisfying crunch and a sweet finish that everyone will love.
Ingredients
- 1 cup all-purpose flour
- 1/2 cup unsalted butter, softened
- 1/4 cup brown sugar
- 1/4 teaspoon salt
- 2 cups pecans, chopped
- 1 cup corn syrup
- 1 cup granulated sugar
- 3 large eggs
- 1 teaspoon vanilla extract
- 1/4 cup caramel sauce, for drizzling
Instructions
- Preheat your oven to 350°F (175°C). Grease a 9×9 inch baking dish.
- In a bowl, mix flour, softened butter, brown sugar, and salt until crumbly. Press this mixture into the bottom of the prepared dish to form a crust.
- Bake the crust for about 15 minutes, or until lightly golden.
- In another bowl, whisk together corn syrup, granulated sugar, eggs, and vanilla extract until smooth. Stir in the chopped pecans.
- Pour the pecan mixture over the baked crust and spread evenly.
- Bake for an additional 25-30 minutes, or until the filling is set and slightly puffed.
- Let the bars cool completely in the pan before cutting into squares. Drizzle with caramel sauce before serving.
Eggnog Cheesecake
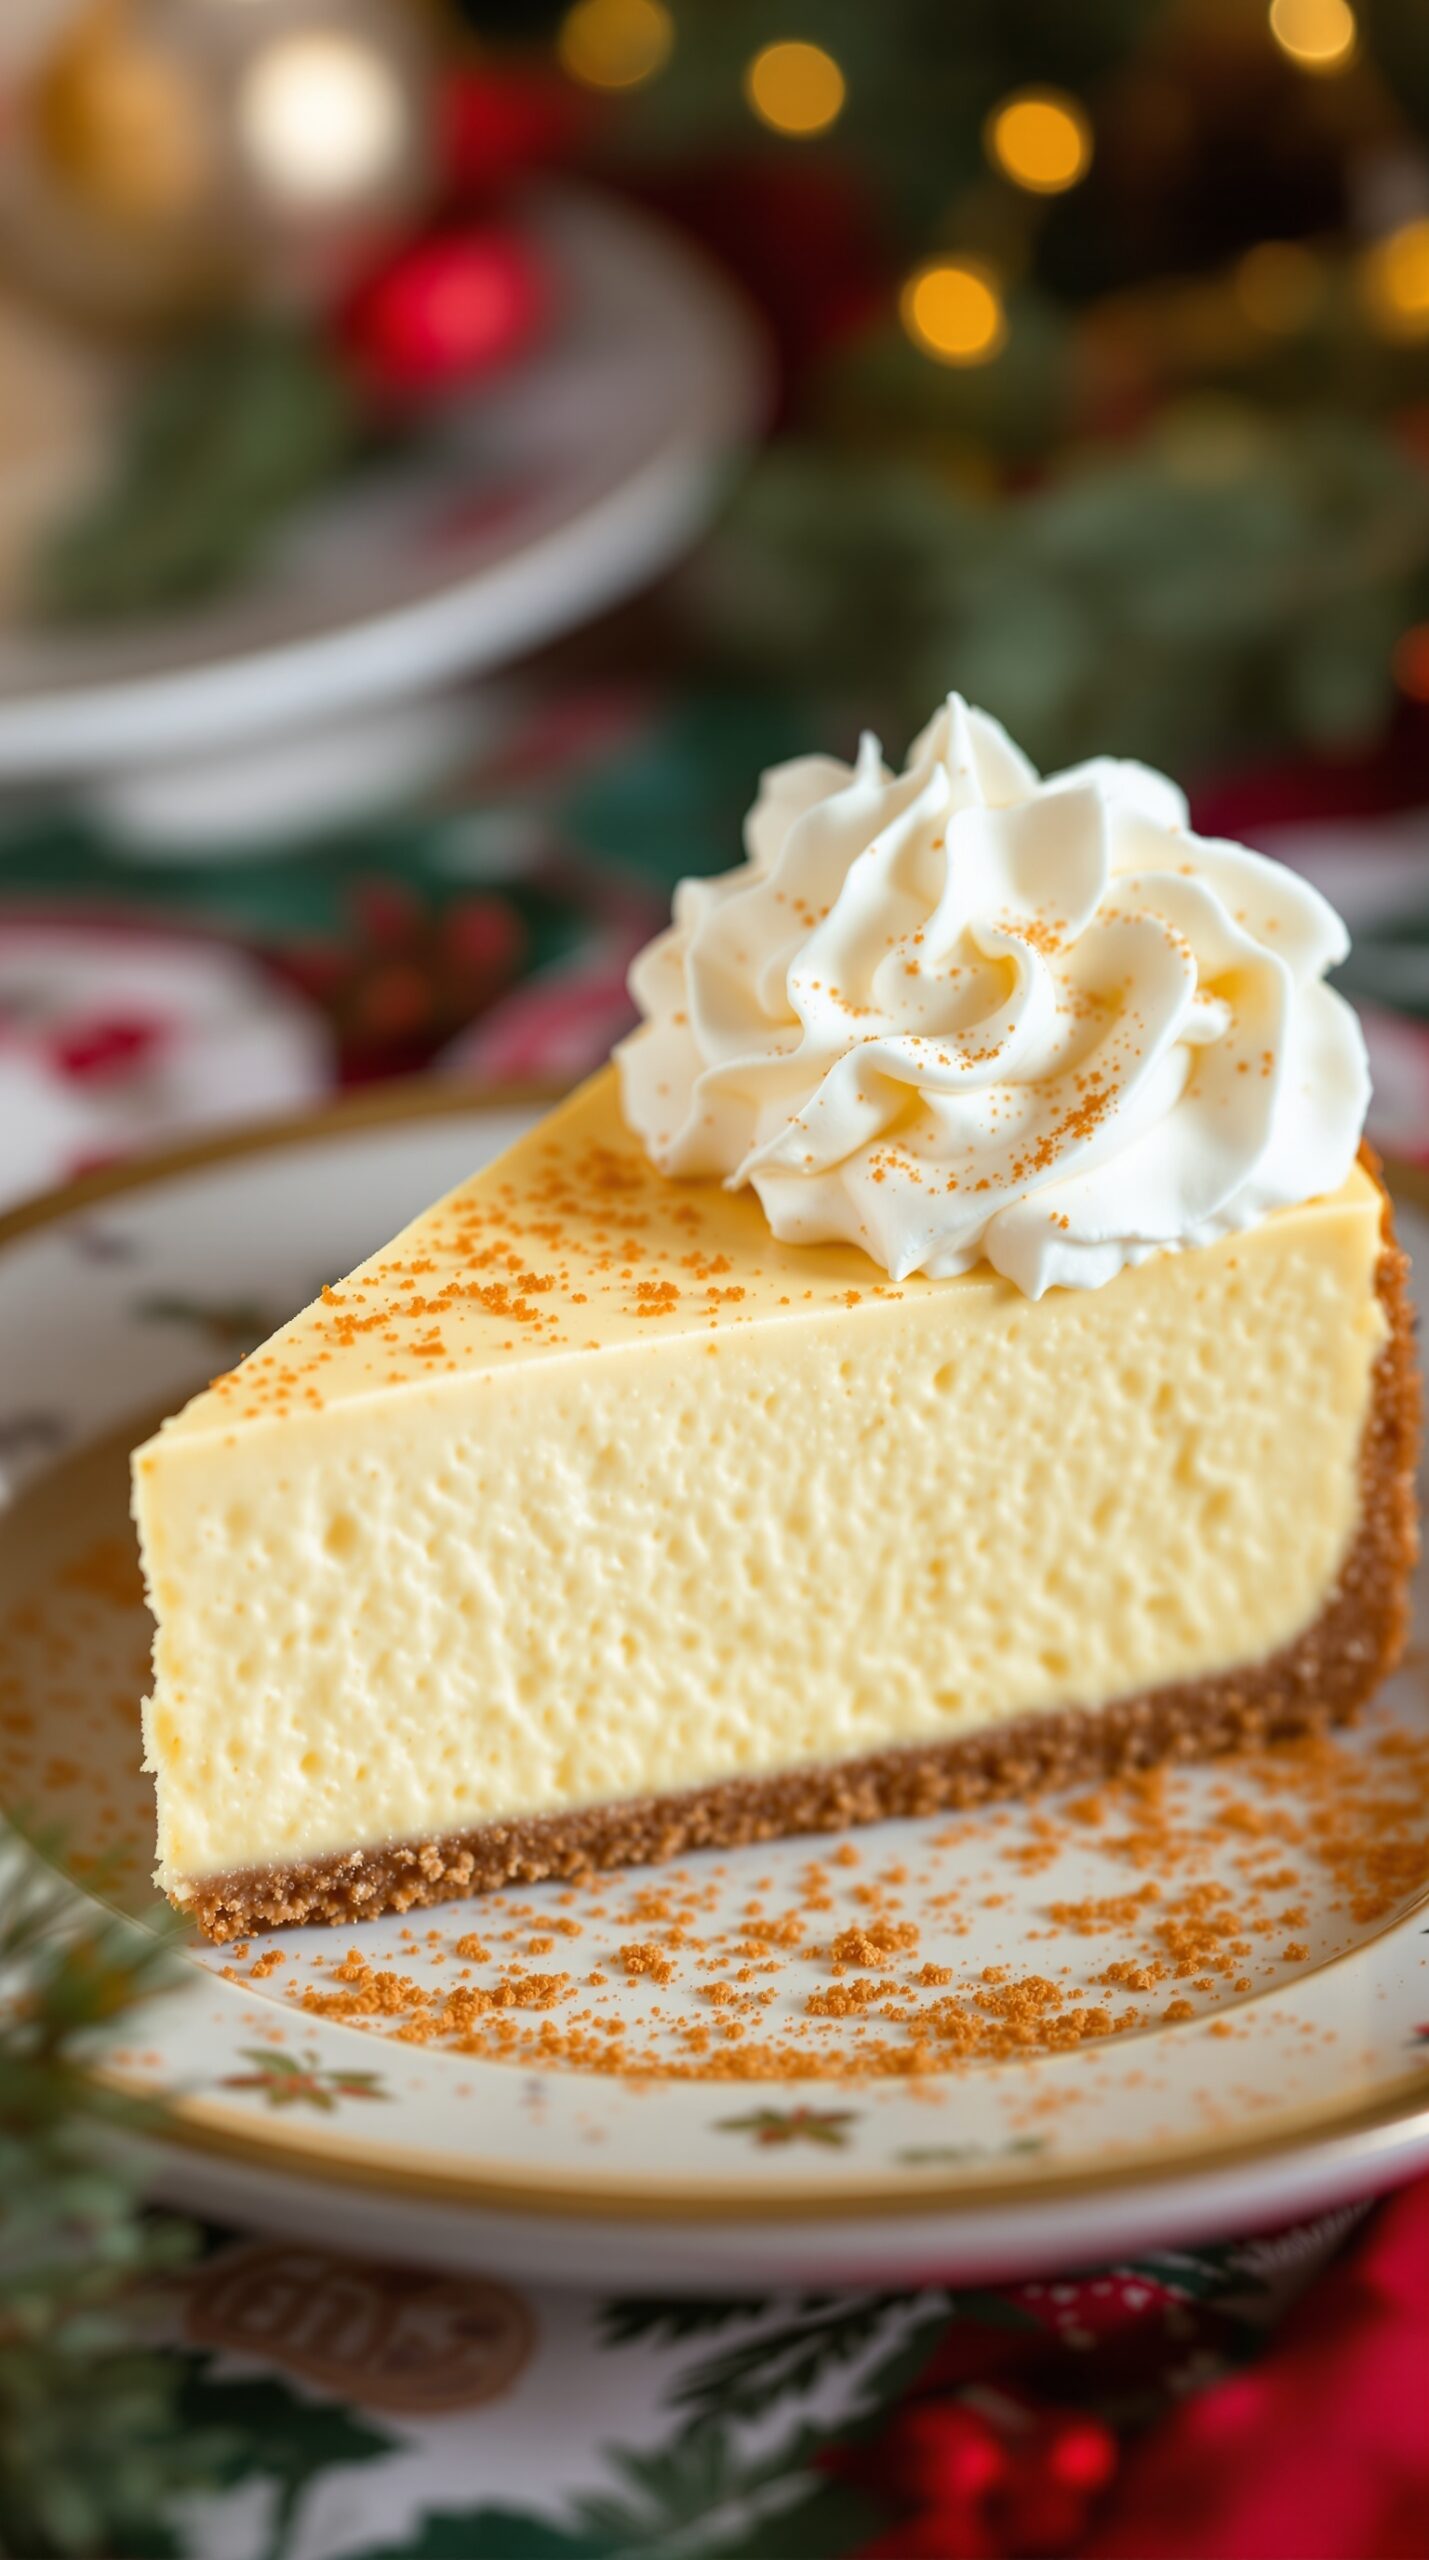
Eggnog cheesecake is a delightful twist on the classic holiday drink. This creamy dessert captures the essence of eggnog with its rich flavors and smooth texture. The golden crust adds a nice crunch, making each bite a treat. Topped with whipped cream and a sprinkle of nutmeg, it’s perfect for holiday gatherings.
The cheesecake is made with simple ingredients that blend beautifully. Cream cheese provides the base, while eggnog brings that festive flavor. A hint of nutmeg and vanilla enhances the taste, making it feel like a warm hug on a chilly winter evening.
To make this cheesecake, you’ll need a few key ingredients. Start with graham cracker crumbs for the crust, and don’t forget the eggnog! The preparation is straightforward, and the result is a show-stopping dessert that will impress your guests.
Ingredients
- 1 ½ cups graham cracker crumbs
- ½ cup unsalted butter, melted
- 2 (8 oz) packages cream cheese, softened
- 1 cup granulated sugar
- 1 cup eggnog
- 3 large eggs
- 1 teaspoon vanilla extract
- 1 teaspoon ground nutmeg
- Whipped cream for topping
Instructions
- Preheat the oven to 325°F (160°C).
- In a bowl, combine graham cracker crumbs and melted butter. Press the mixture into the bottom of a 9-inch springform pan.
- In a large mixing bowl, beat the cream cheese and sugar until smooth. Add the eggnog, eggs, vanilla, and nutmeg. Mix until well combined.
- Pour the cheesecake mixture over the crust in the springform pan.
- Bake for 50-60 minutes, or until the center is set. Let it cool in the oven with the door slightly open for about an hour.
- Refrigerate for at least 4 hours or overnight before serving. Top with whipped cream and a sprinkle of nutmeg before slicing.
Yule Log Cake
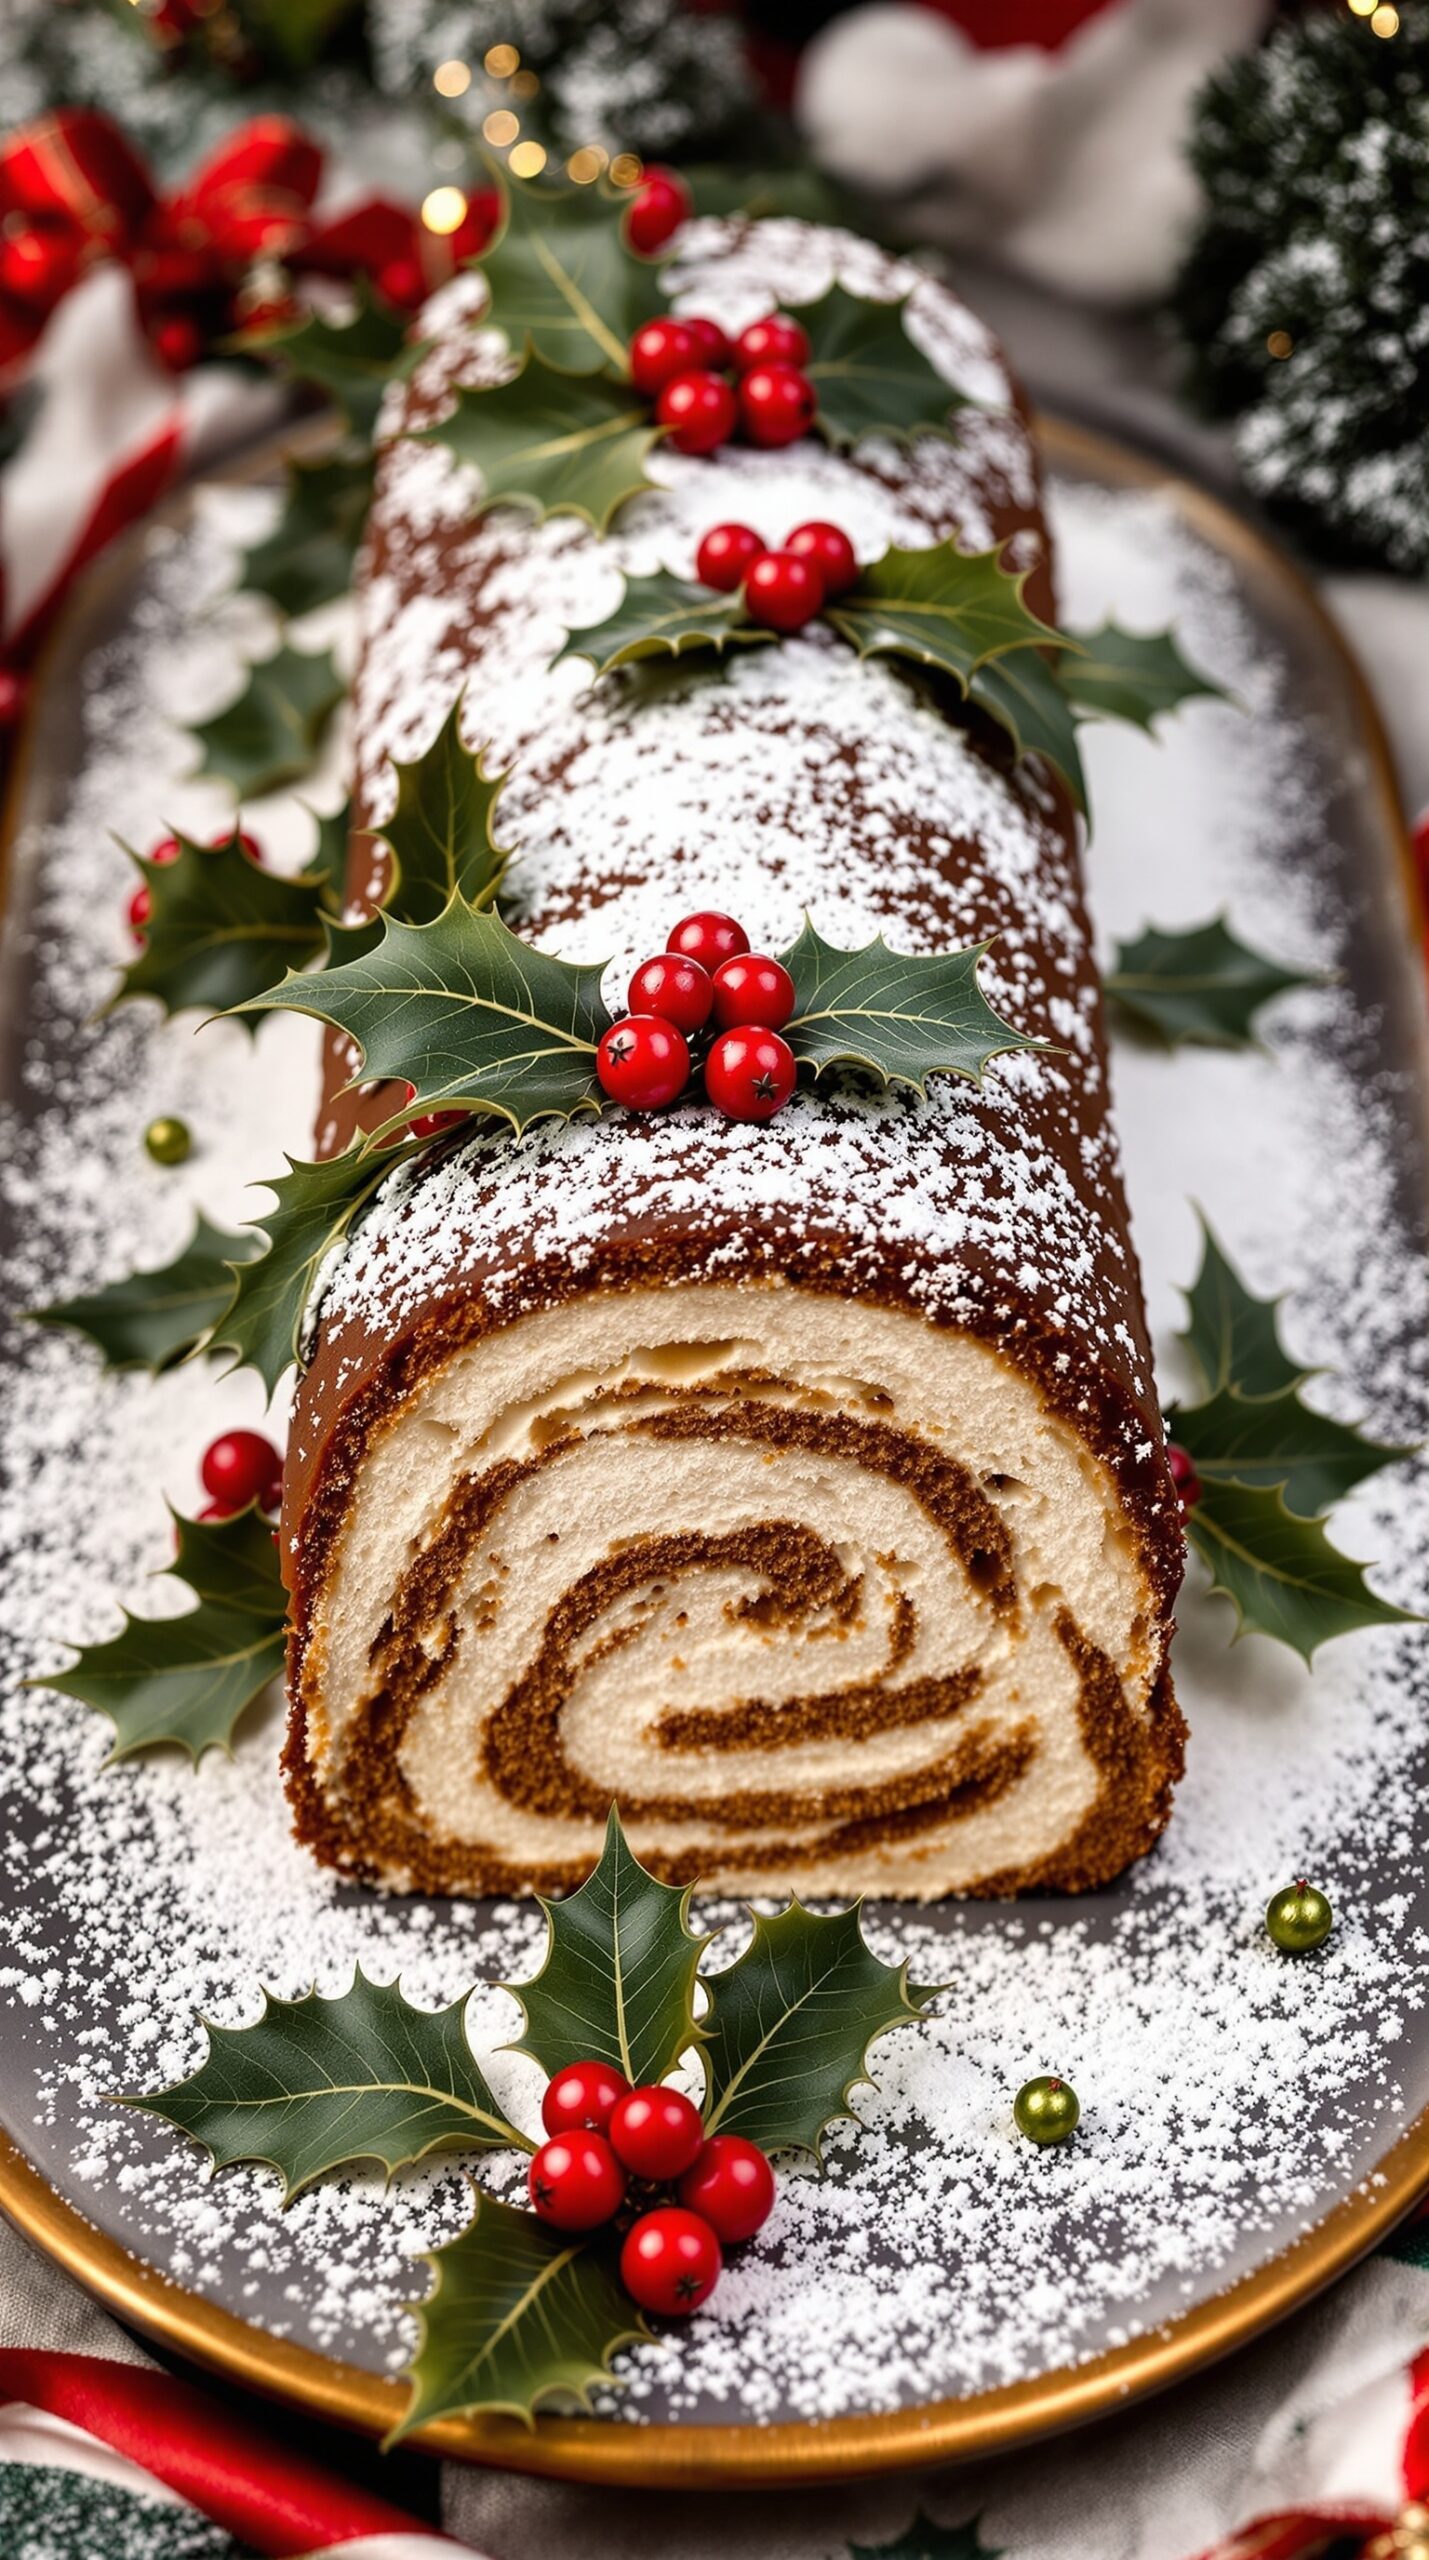
The Yule Log Cake, or Bûche de Noël, is a classic holiday dessert that brings a festive touch to any table. This delightful cake is shaped like a log, often decorated with powdered sugar to resemble snow. The rich chocolate flavor pairs perfectly with the creamy filling, making it a favorite during the Christmas season.
In the image, you can see a beautifully crafted Yule Log Cake adorned with holly leaves and bright red berries. The presentation is stunning, with the cake dusted in powdered sugar, giving it a winter wonderland vibe. This dessert not only looks great but also tastes amazing, making it a must-have for holiday gatherings.
Making a Yule Log Cake is a fun and rewarding experience. It involves baking a light sponge cake, rolling it up with a delicious filling, and then decorating it to resemble a log. It’s a great way to impress your guests and share the holiday spirit!
Peppermint Mocha Cupcakes
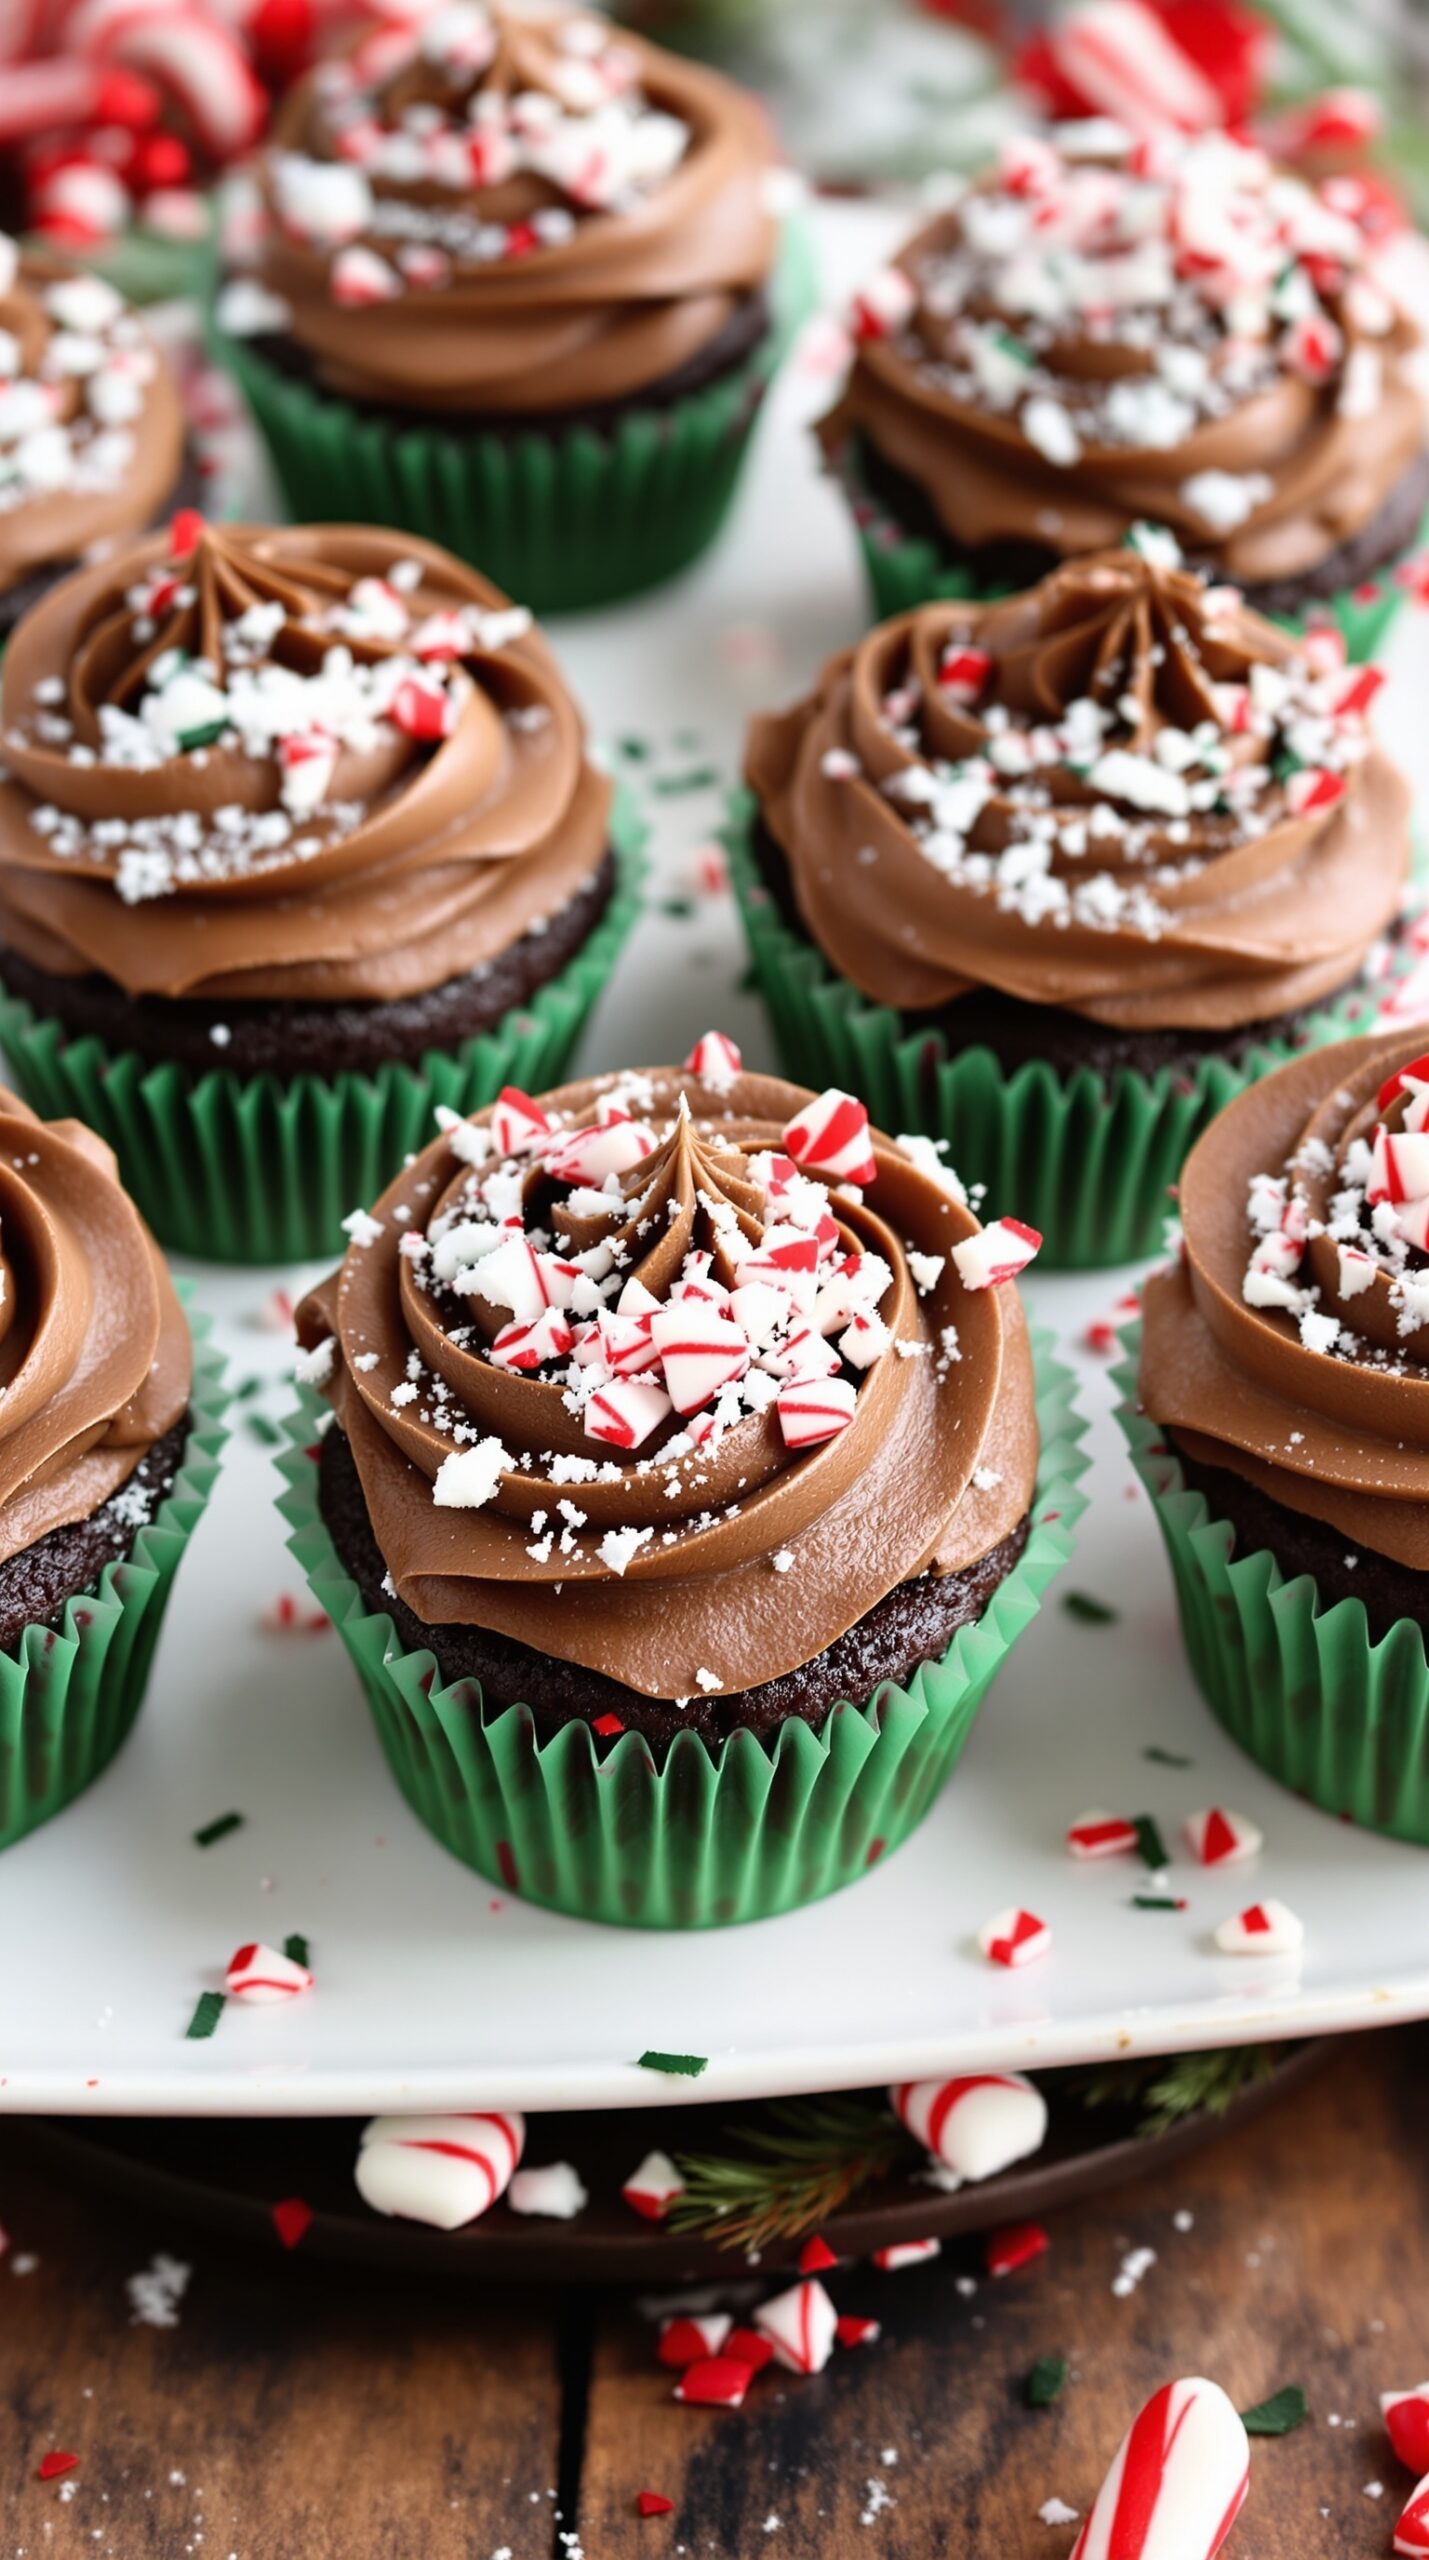
These peppermint mocha cupcakes are a festive treat that combines the rich flavors of chocolate and coffee with a refreshing hint of peppermint. Topped with creamy chocolate frosting and sprinkled with crushed candy canes, they are perfect for holiday gatherings or cozy nights in.
The deep brown color of the cupcakes contrasts beautifully with the green liners and the snowy white of the crushed peppermint. Each bite delivers a delightful mix of flavors that will surely bring a smile to anyone’s face. They are not only delicious but also visually appealing, making them a great centerpiece for your dessert table.
Making these cupcakes is simple and fun. You can involve the kids or friends in the decorating process, adding a personal touch to each cupcake. The combination of chocolate and peppermint is a classic holiday flavor that everyone loves!
Ingredients
- 1 cup all-purpose flour
- 1 cup granulated sugar
- 1/3 cup unsweetened cocoa powder
- 1 teaspoon baking powder
- 1/2 teaspoon baking soda
- 1/4 teaspoon salt
- 1/2 cup brewed coffee, cooled
- 1/2 cup vegetable oil
- 1 large egg
- 1 teaspoon vanilla extract
- 1/2 teaspoon peppermint extract
- 1 cup chocolate frosting
- 1/4 cup crushed candy canes
Instructions
- Preheat your oven to 350°F (175°C) and line a cupcake pan with green liners.
- In a mixing bowl, combine flour, sugar, cocoa powder, baking powder, baking soda, and salt.
- In another bowl, whisk together the cooled coffee, vegetable oil, egg, vanilla extract, and peppermint extract.
- Pour the wet ingredients into the dry ingredients and mix until just combined.
- Fill each cupcake liner about two-thirds full with the batter.
- Bake for 18-20 minutes, or until a toothpick inserted in the center comes out clean. Let them cool completely.
- Once cooled, frost each cupcake with chocolate frosting and sprinkle with crushed candy canes.
Gingerbread House Decorating
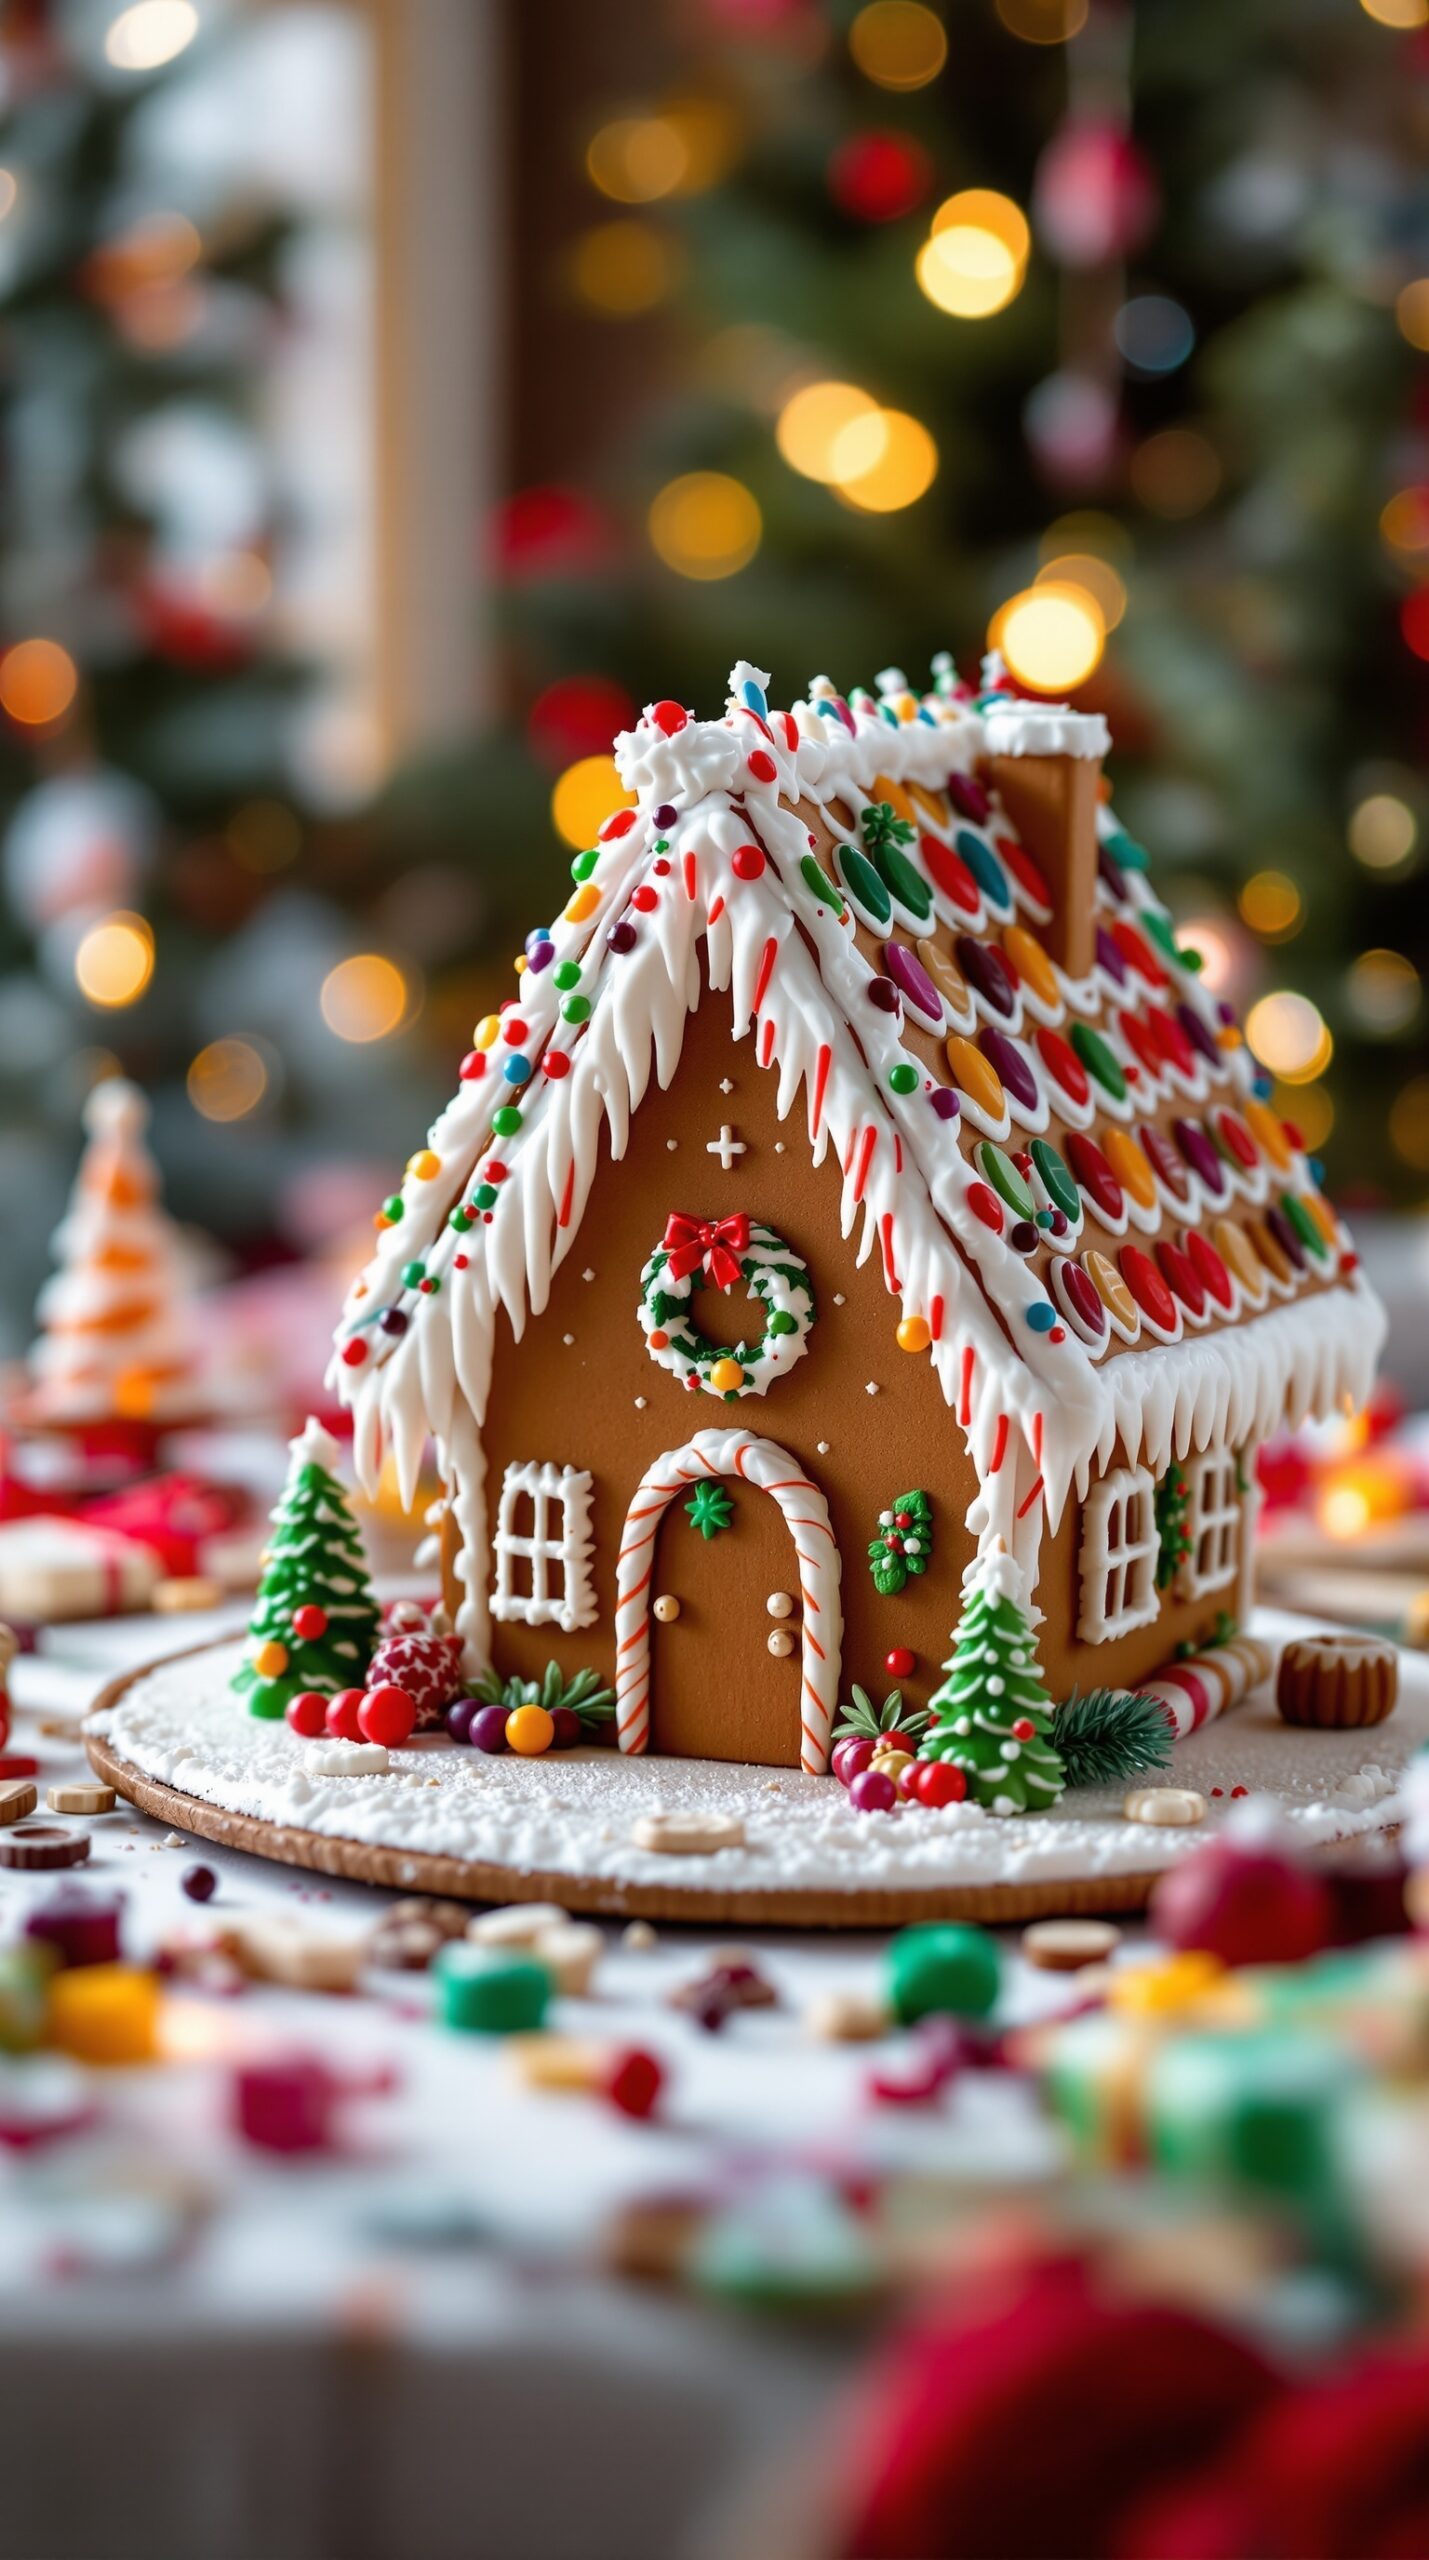
Gingerbread house decorating is a fun and festive activity that brings everyone together during the holiday season. Picture a charming little house made of gingerbread, adorned with colorful candies and icing. The bright decorations create a cheerful atmosphere, making it a perfect centerpiece for your Christmas festivities.
Gather your family and friends around the table and let your creativity shine. Each person can add their personal touch, whether it’s a sprinkle of edible glitter or a unique candy design. The process is just as enjoyable as the final product, filled with laughter and holiday cheer.
To make your own gingerbread house, you’ll need some basic ingredients and a little bit of patience. Here’s a simple recipe to get you started!
Ingredients
- 3 cups all-purpose flour
- 1 teaspoon baking soda
- 1 tablespoon ground ginger
- 1 tablespoon ground cinnamon
- 1/2 teaspoon ground cloves
- 1/2 teaspoon salt
- 1 cup unsalted butter, softened
- 1 cup brown sugar, packed
- 1/2 cup molasses
- 1 large egg
- 1 teaspoon vanilla extract
- Royal icing (for decoration)
- Assorted candies (for decoration)
Instructions
- Make the Dough: In a bowl, mix flour, baking soda, ginger, cinnamon, cloves, and salt. In another bowl, beat butter and brown sugar until fluffy. Add molasses, egg, and vanilla, mixing well. Gradually add the dry ingredients to form a dough.
- Chill the Dough: Wrap the dough in plastic wrap and chill in the refrigerator for at least 1 hour.
- Shape the House: Preheat your oven to 350°F (175°C). Roll out the dough on a floured surface. Cut out pieces for the house (two walls, two side walls, a roof, and a base) using templates if you have them.
- Bake: Place the cut pieces on a baking sheet lined with parchment paper. Bake for 10-12 minutes or until firm. Let cool completely.
- Decorate: Use royal icing to assemble the house. Once it’s stable, let your imagination run wild with candies and icing!
Chocolate Hazelnut Truffles
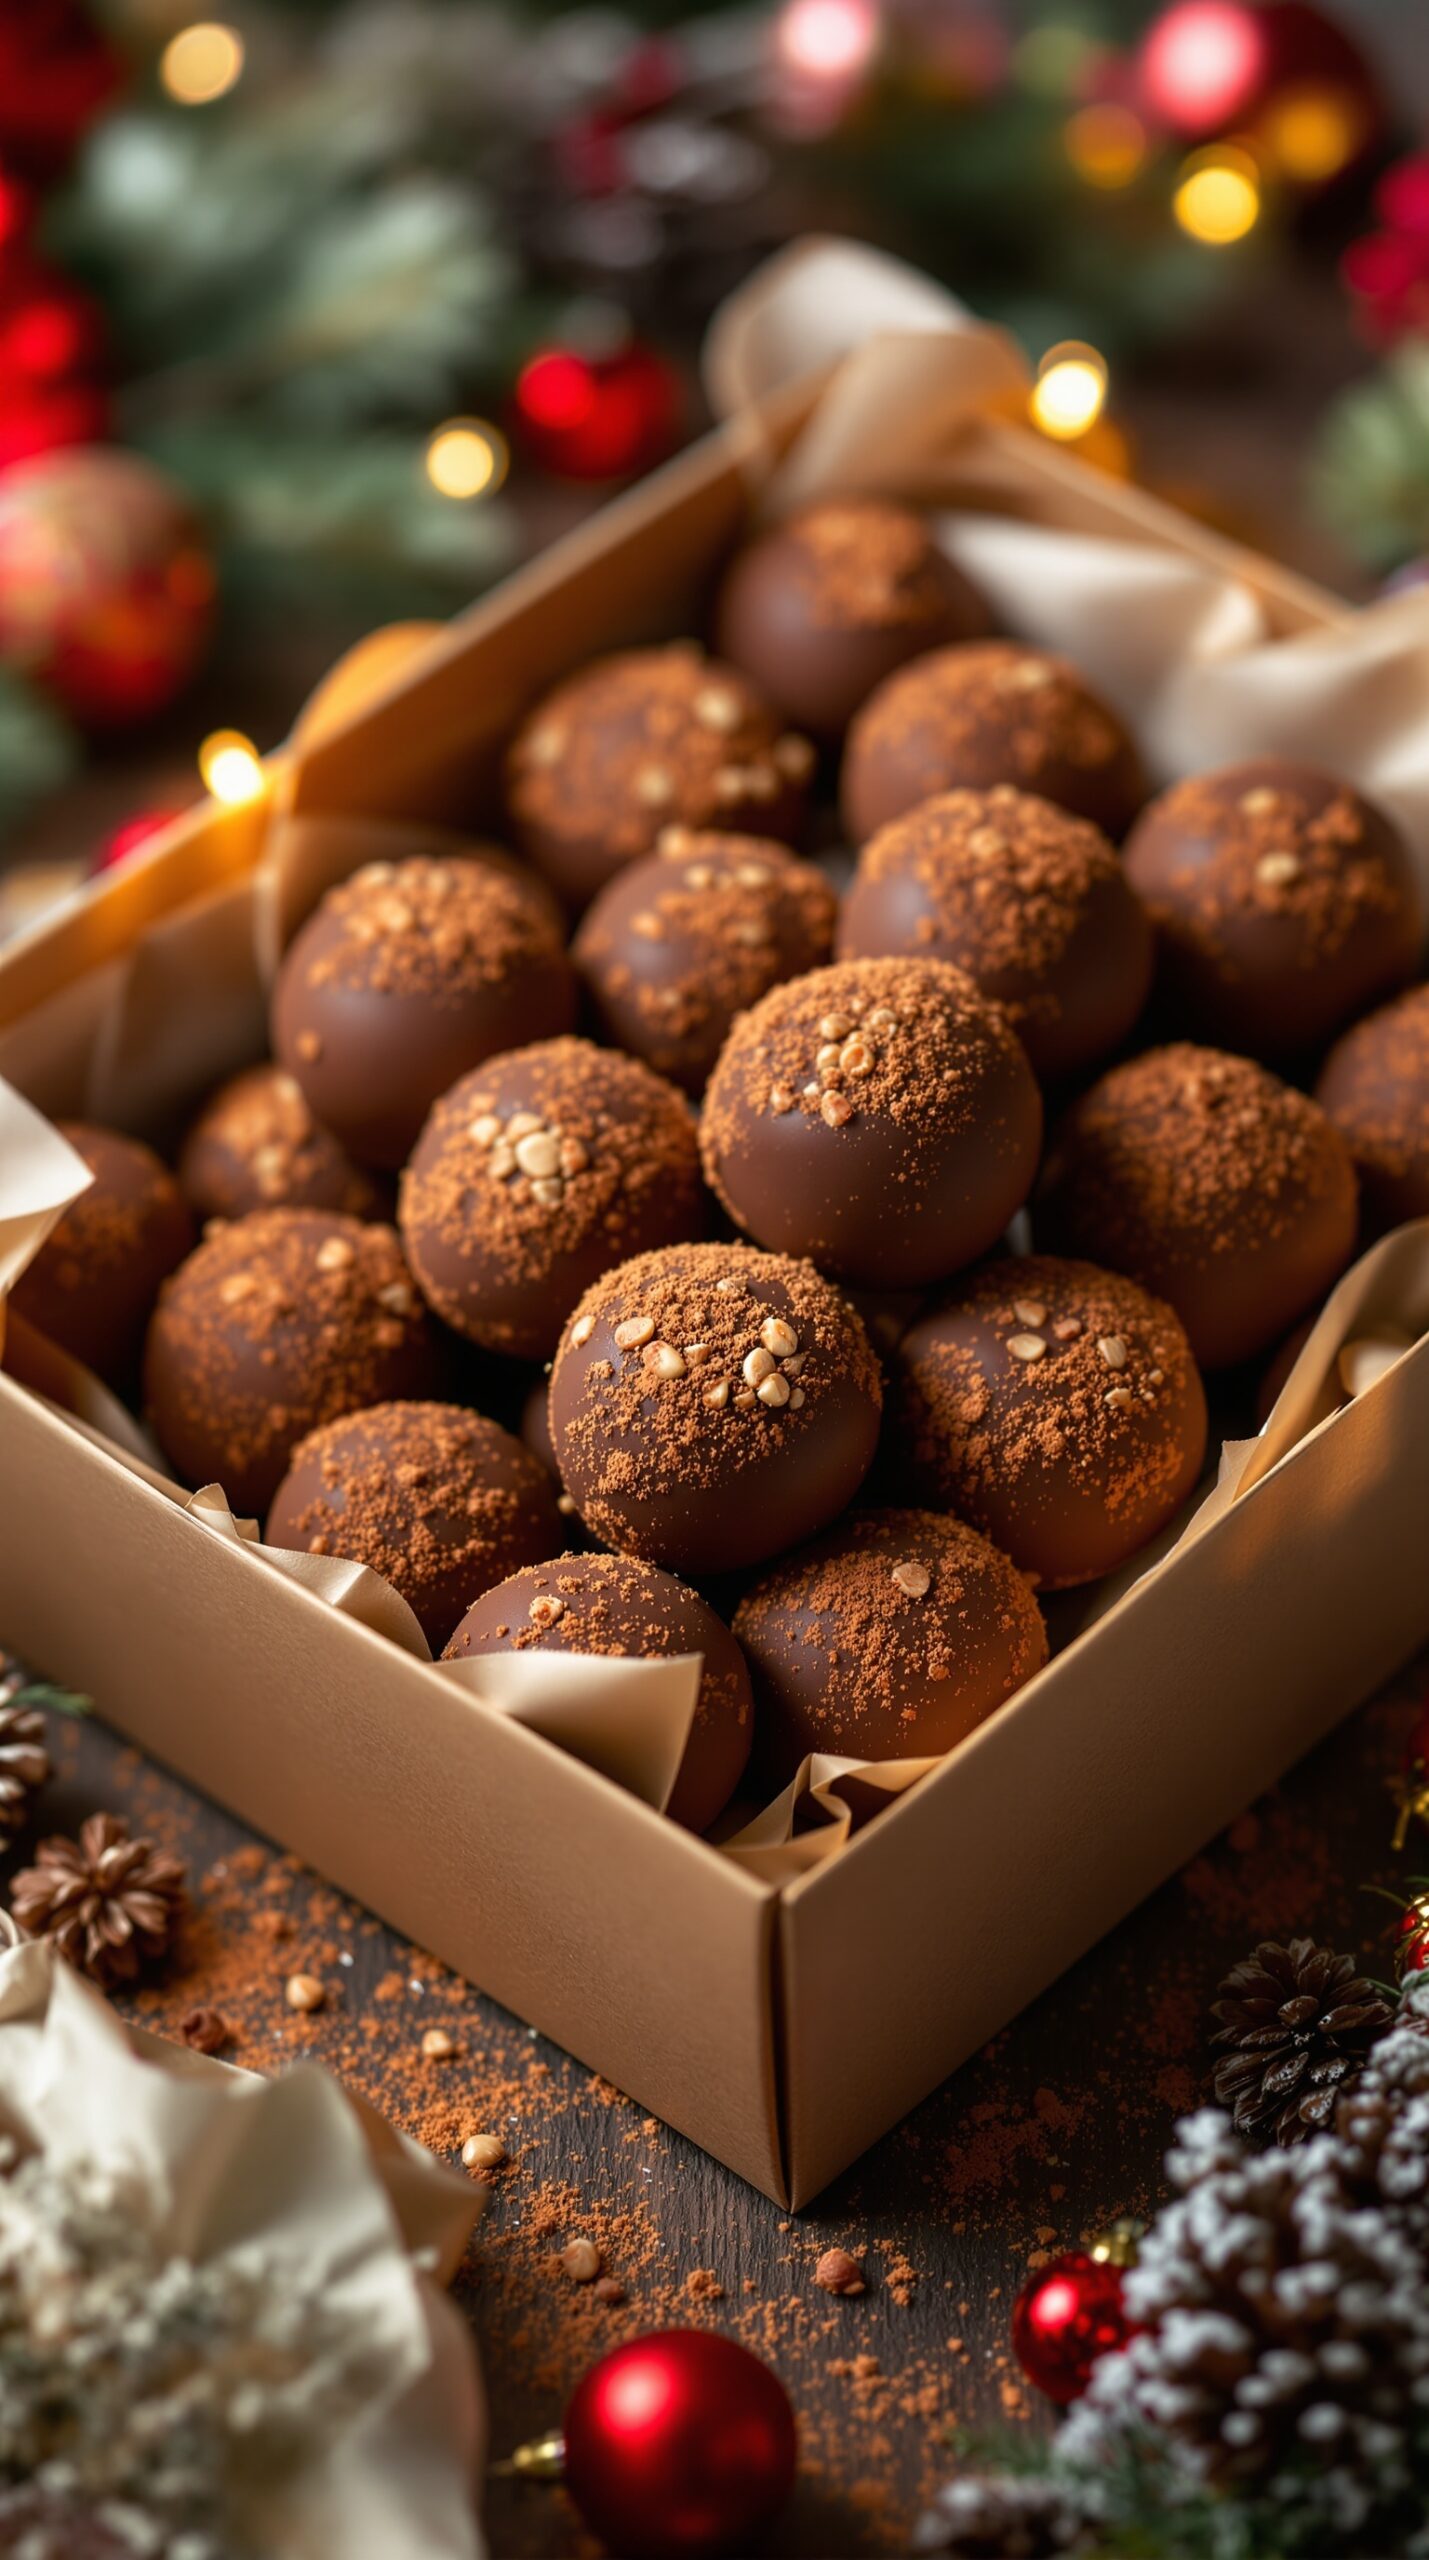
Chocolate hazelnut truffles are a delightful treat that captures the essence of the holiday season. These little bites of joy are rich, creamy, and have a wonderful nutty flavor. The image shows a beautifully arranged box of truffles, sprinkled with crushed hazelnuts and cocoa powder, making them look irresistible.
These truffles are perfect for sharing with family and friends during festive gatherings. They can also be a thoughtful gift, beautifully packaged to bring a smile to anyone’s face. The combination of chocolate and hazelnuts is a classic that never fails to impress.
Making these truffles is simple and fun. You can easily whip them up in your kitchen and customize them to your liking. Whether you want to roll them in cocoa powder, crushed nuts, or even sprinkles, the choice is yours!
Ingredients
- 1 cup dark chocolate chips
- 1/2 cup heavy cream
- 1/2 cup ground hazelnuts
- 1 teaspoon vanilla extract
- 1/4 cup cocoa powder (for rolling)
- 1/4 cup crushed hazelnuts (for garnish)
Instructions
- Heat the cream in a small saucepan over medium heat until it just begins to simmer. Remove from heat.
- Add the chocolate chips to the warm cream and let sit for a minute. Stir until smooth and fully melted.
- Mix in the ground hazelnuts and vanilla extract until well combined.
- Chill the mixture in the refrigerator for about 2 hours, or until firm enough to scoop.
- Once chilled, use a small scoop or your hands to form balls from the mixture.
- Roll each truffle in cocoa powder and then in crushed hazelnuts for added texture.
- Place the truffles in a box or on a plate, and enjoy your homemade treats!
Snowman Cookies
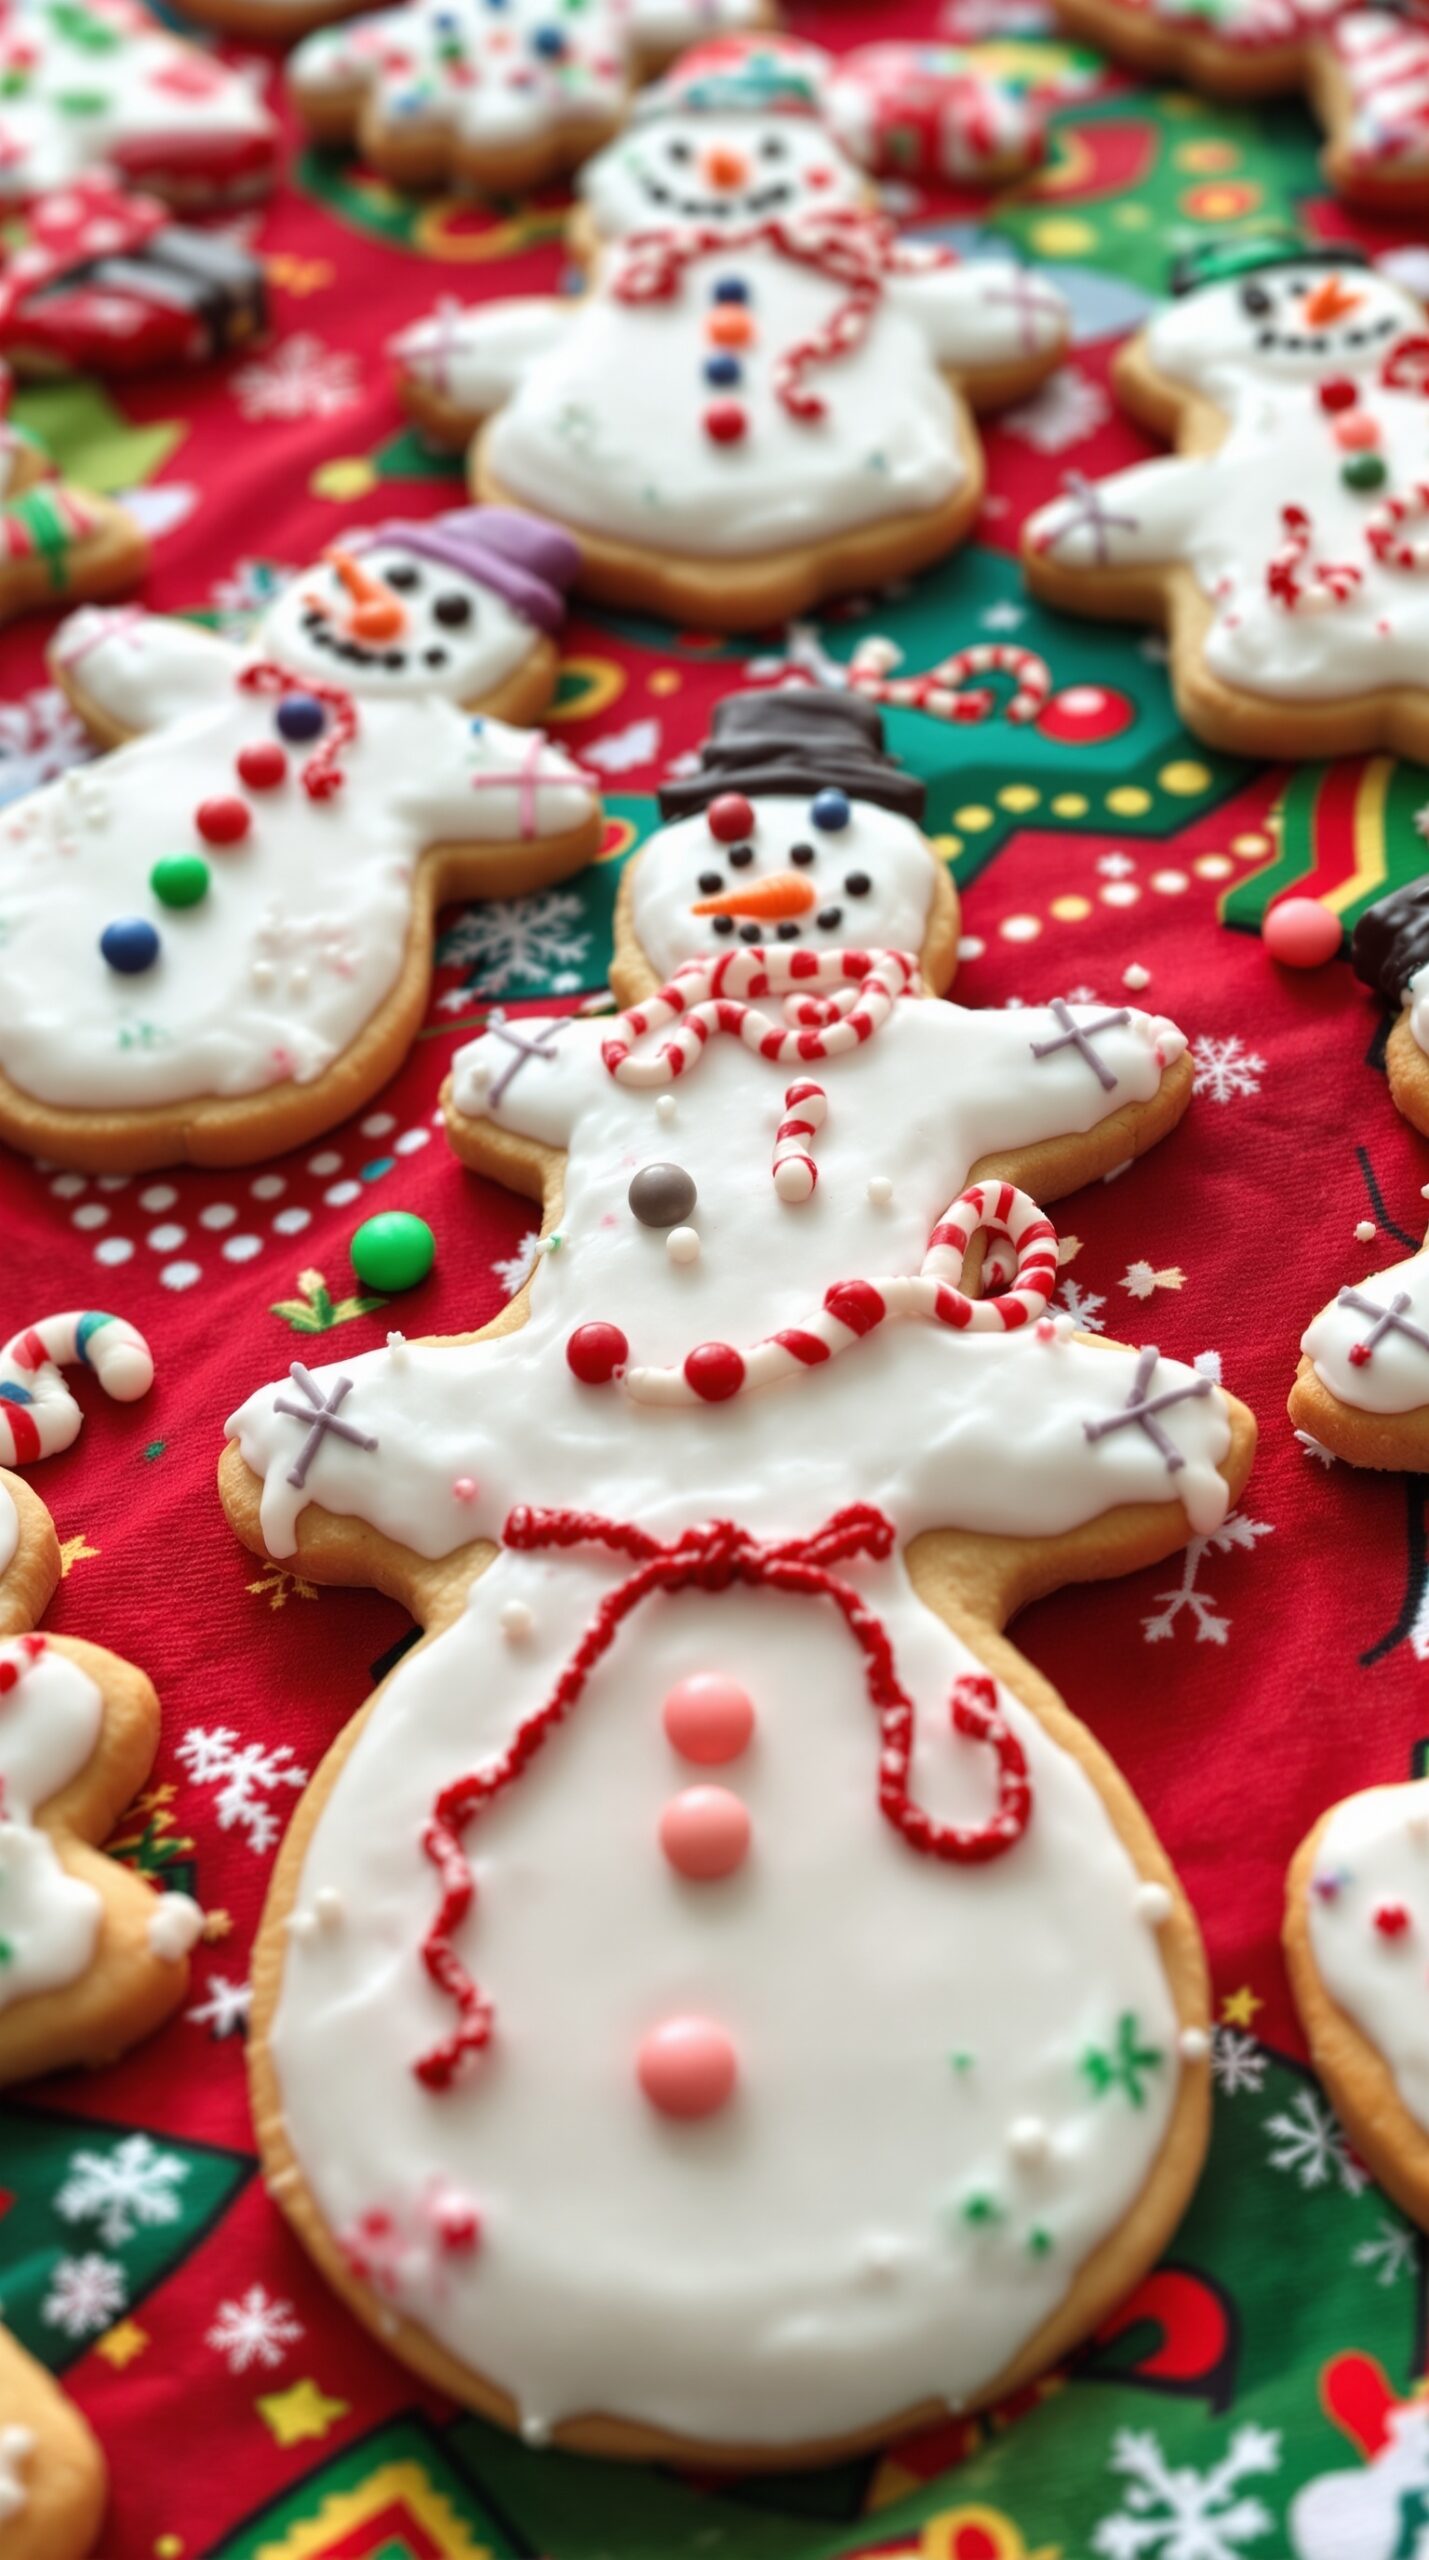
Snowman cookies are a delightful treat that brings a smile to everyone’s face during the holiday season. These charming cookies are not just tasty; they also add a festive touch to any gathering. With their cute designs and colorful decorations, they are perfect for sharing with friends and family.
Each cookie is shaped like a snowman, complete with icing that resembles snow and fun decorations like candy buttons and scarves. The creativity involved in decorating these cookies makes it a fun activity for kids and adults alike. You can let your imagination run wild with different colors and designs!
Making snowman cookies is a simple process that involves baking sugar cookies and then decorating them with royal icing and candies. They can be a great addition to your holiday dessert table or a sweet gift for neighbors.
Ingredients
- 2 ¾ cups all-purpose flour
- 1 teaspoon baking soda
- ½ teaspoon baking powder
- 1 cup unsalted butter, softened
- 1 ½ cups white sugar
- 1 egg
- 1 teaspoon vanilla extract
- 3 cups powdered sugar
- 2 tablespoons meringue powder
- Water (as needed)
- Candy decorations (like mini chocolate chips, sprinkles, and candy canes)
Instructions
- Preheat your oven to 375°F (190°C).
- In a bowl, mix together flour, baking soda, and baking powder. Set aside.
- In another bowl, cream together the butter and sugar until smooth. Beat in the egg and vanilla.
- Gradually blend the dry ingredients into the wet mixture.
- Roll rounded teaspoonfuls of dough into balls, and place them on ungreased cookie sheets. Flatten slightly.
- Bake for 8 to 10 minutes in the preheated oven, until golden. Let cool on wire racks.
- For the icing, mix powdered sugar, meringue powder, and water until smooth. Adjust the consistency as needed.
- Once cookies are cool, decorate them with icing and candy to create your snowman designs.
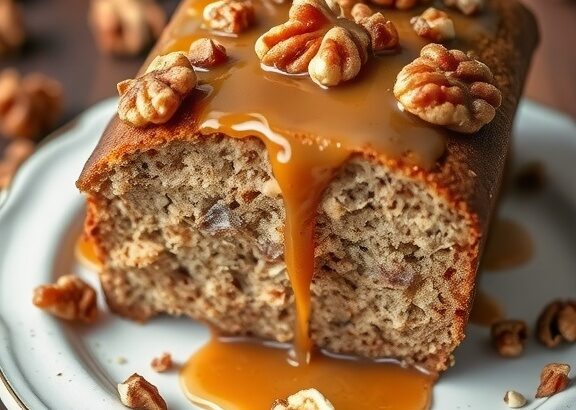
Fruitcake with Nuts and Dried Fruits
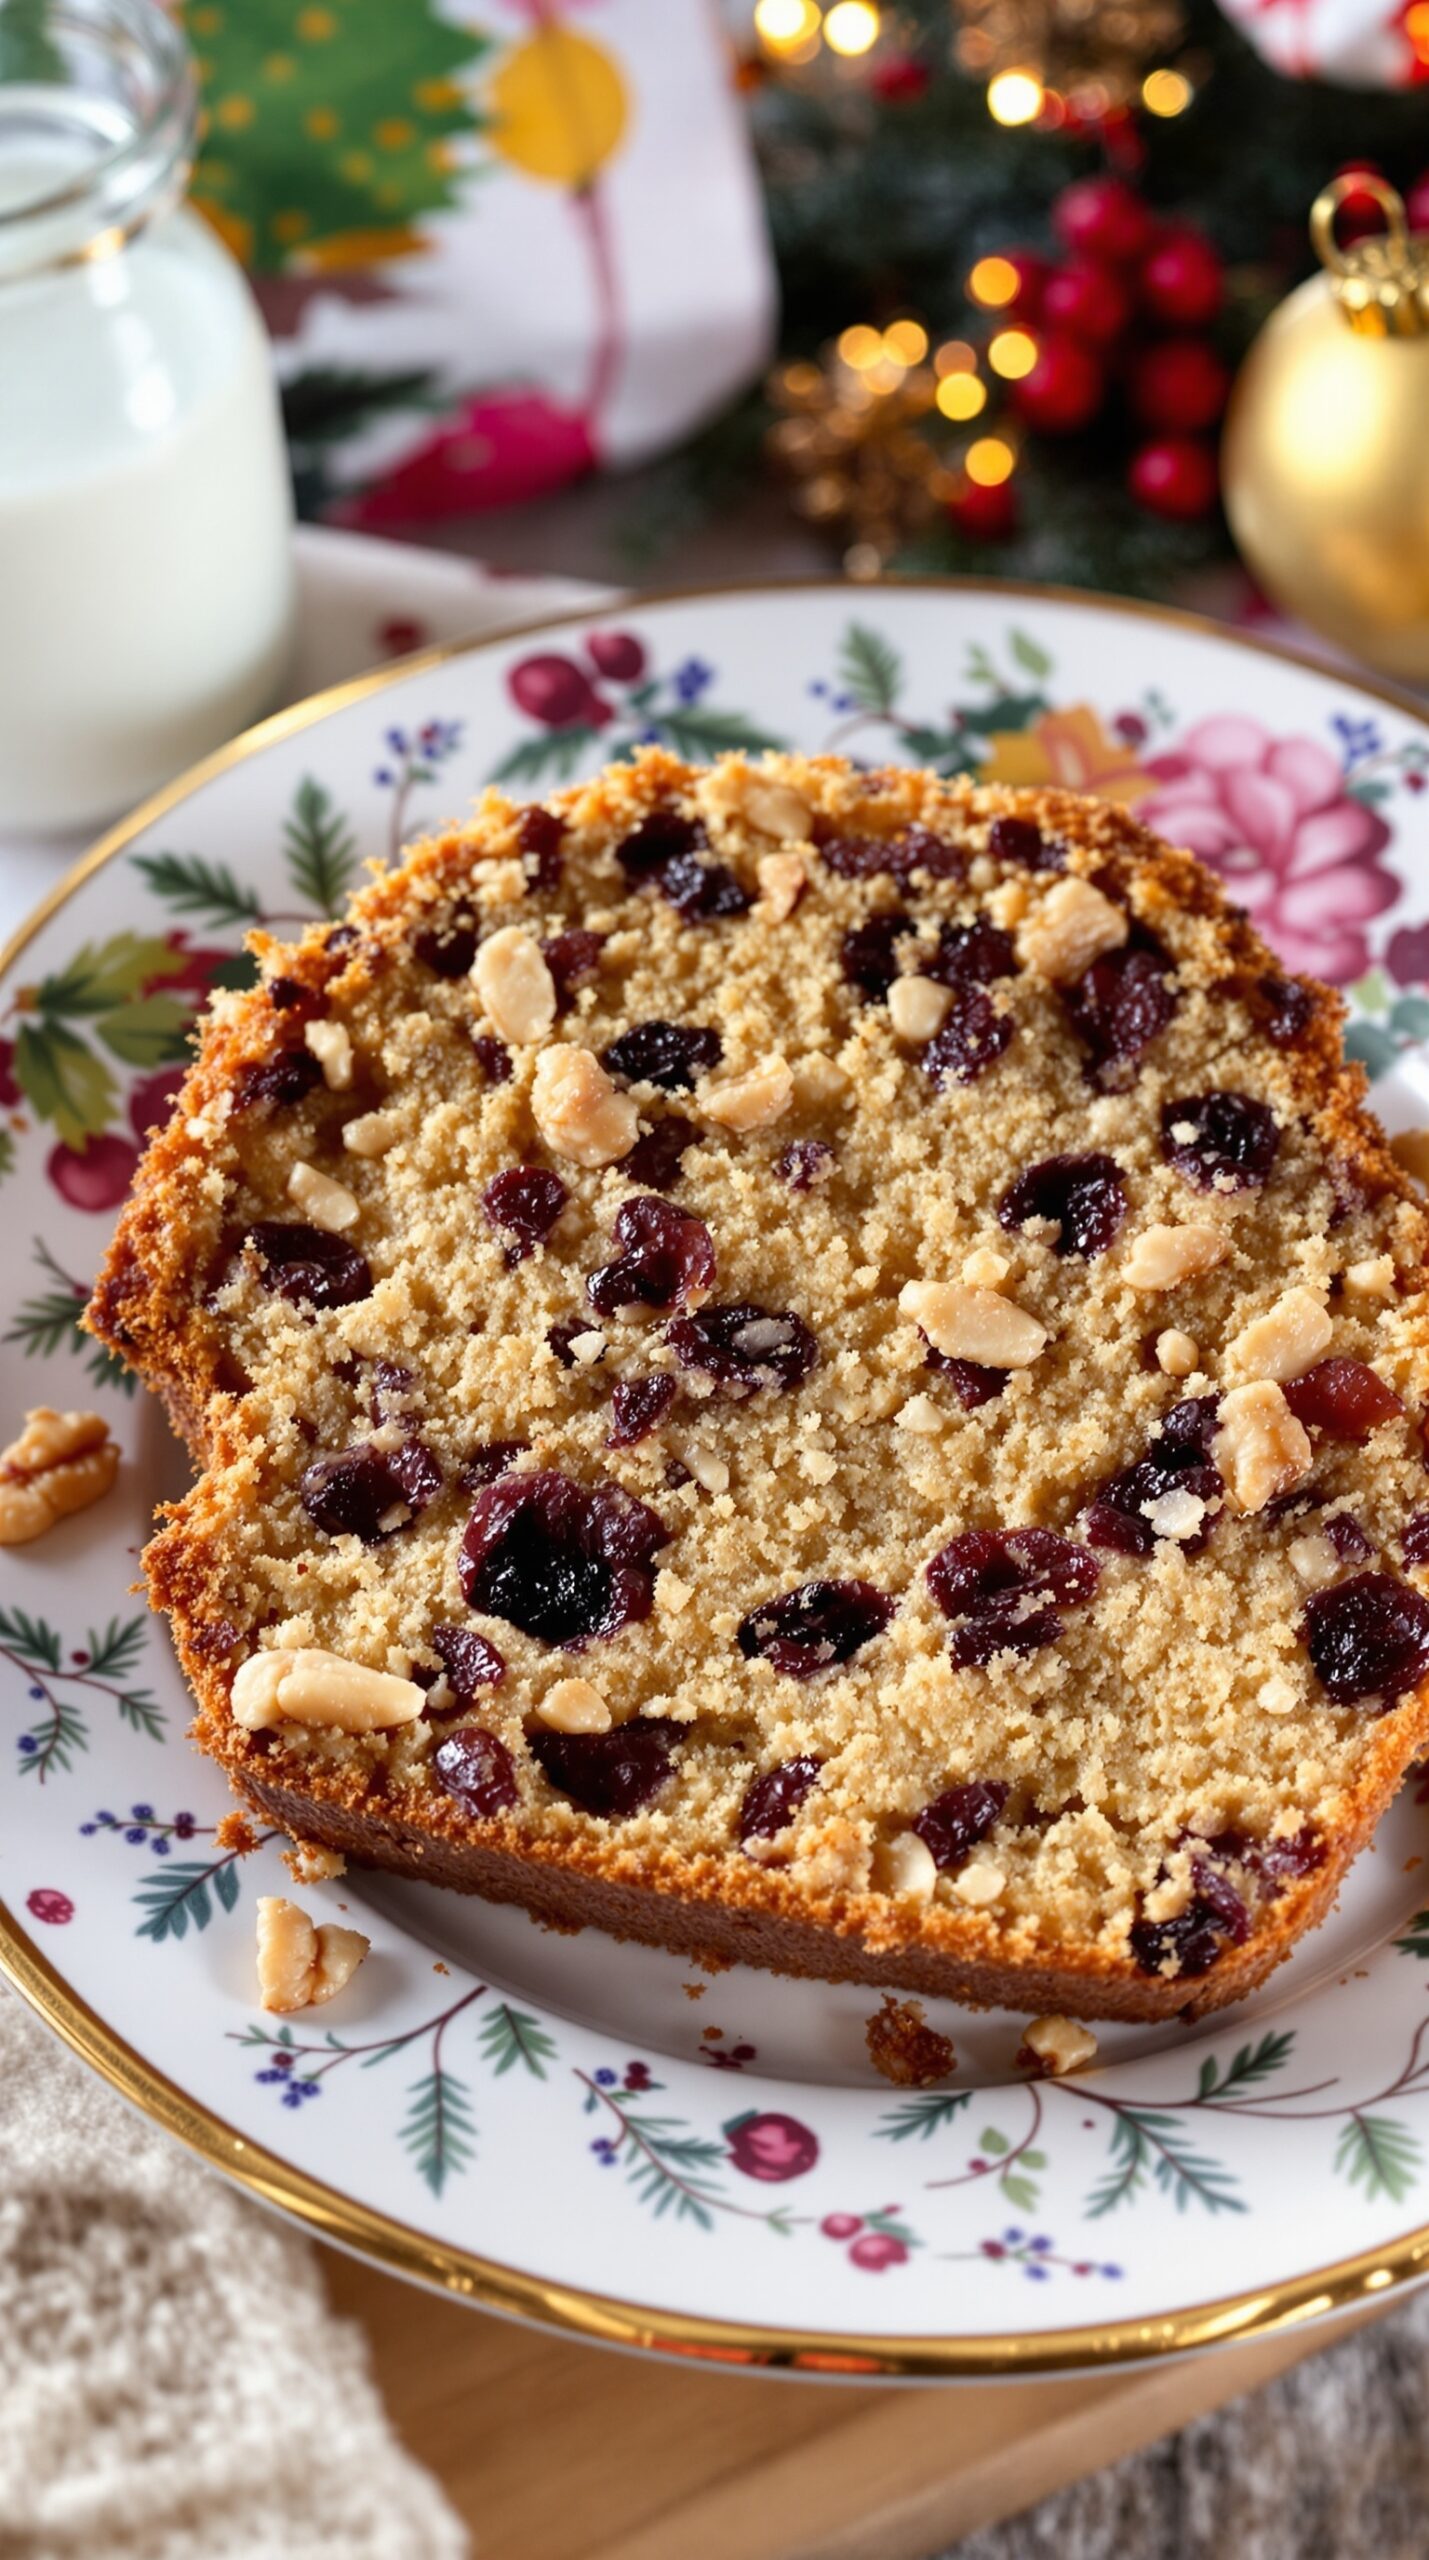
Fruitcake is a classic holiday treat that brings warmth and cheer to any gathering. This version is packed with nuts and dried fruits, making it a delightful addition to your Christmas dessert table. The golden-brown crust and the colorful bits of fruit create a feast for the eyes as well as the taste buds.
Each slice reveals a moist, crumbly texture filled with sweet dried cherries, tangy cranberries, and crunchy walnuts. It’s perfect for sharing with family and friends, or enjoying with a cozy cup of tea. The festive plate adds a touch of holiday spirit, making this dessert even more special.
Whether you’re a fan of traditional fruitcake or trying it for the first time, this recipe is sure to impress. It’s easy to make and can be prepared ahead of time, allowing the flavors to meld beautifully. So, let’s get baking!
Ingredients
- 2 cups mixed dried fruits (like cherries, cranberries, and raisins)
- 1 cup chopped nuts (walnuts or pecans)
- 1 cup all-purpose flour
- 1/2 cup granulated sugar
- 1/2 cup unsalted butter, softened
- 2 large eggs
- 1 teaspoon baking powder
- 1 teaspoon vanilla extract
- 1/2 teaspoon ground cinnamon
- 1/4 teaspoon salt
Instructions
- Preheat your oven to 350°F (175°C). Grease a loaf pan and set aside.
- In a bowl, mix the dried fruits and nuts together. This helps distribute them evenly in the batter.
- In a separate bowl, cream together the softened butter and sugar until light and fluffy. Add the eggs one at a time, mixing well after each addition.
- Stir in the vanilla extract, baking powder, cinnamon, and salt. Gradually add the flour, mixing until just combined.
- Fold in the fruit and nut mixture until evenly distributed.
- Pour the batter into the prepared loaf pan and smooth the top. Bake for 50-60 minutes, or until a toothpick inserted in the center comes out clean.
- Let the fruitcake cool in the pan for about 10 minutes before transferring it to a wire rack to cool completely.
- Slice and serve, or wrap it up for gifting!